Showing posts with label freezer friendly. Show all posts

Wednesday, February 1, 2017

Salmon Quinoa Patties


Jana here with a recipe my whole family really likes!  These Salmon Quinoa Patties are really fast to mix up, and get ready for dinner. We like to eat them with sweet potatoes, and broccoli a lot of times! They are also good to freeze, if you want to double or triple the batch. They are packed with protein, and really delicious.

Salmon Quinoa Patties
(yield: 6-8 patties)

1 can salmon (remove the bones that are typically in the middle)
1 egg, lightly beaten
3/4 cup quinoa, cooked (I used a quinoa blend this time that included red quinoa)
1/4 cup parmesan cheese
1/2 teaspoon salt
1/2 teaspoon black pepper
1 teaspoon Italian seasonings (or basil if you don't have this)
oil to cook (we prefer coconut oil)

1. Heat the oil over medium high heat in an electric skillet or medium size pan.

2. Combine all ingredients, and mix until well combined.

3. Form patties, and place in the oil to cook. Cook on each side for approximately 3-4 minutes or until they are browned. Flip, and cook the opposite side until golden brown.

Enjoy!


Sunday, January 22, 2017

Coffee Cake Muffins


Jana here with a muffin recipe that is sure to be a favorite!  I have noted this before, but I like to double a muffin recipe, and freeze the muffins. I then pull out how many I need for a breakfast meal, microwave, and they're ready to go. I told my kids that this was more of a specialty muffin. It has a few extra steps, because you are making a crumble for the filling, but it is worth the time! Another tip: if you are making a recipe that calls for buttermilk and you don't have any, there is a really easy substitute. For each cup of buttermilk you need, use 1 cup of regular milk, plus 1 tablespoon of either vinegar or lemon juice. Stir to combine, and you are good to go!

Coffee Cake Muffins
(yield: 9 muffins)

Filling:
3 tablespoons all-purpose flour
3 tablespoons brown sugar
1/4 teaspoon ground cinnamon
2 tablespoons butter
3 tablespoons chopped walnuts or pecans (optional)

Muffin Batter:
1 1/2 cups all-purpose flour
1/2 cup sugar
1 teaspoon baking powder
1/2 teaspoon ground cinnamon
1/4 teaspoon ground ginger
1/4 teaspoon baking soda
1/4 teaspoon salt
1/4 cup butter, melted
1 egg
1/2 cup buttermilk
1 teaspoon vanilla extract

1. Grease a muffin tin. (I prefer a silicone muffin pan) Preheat the oven to 375 degrees.

2. For the filling: in a small bowl, stir together the flour, brown sugar, and cinnamon. Cut in the 2 tablespoons of butter until the mixture looks like coarse crumbs. (grating the cold butter will help with this process) Stir in the nuts if using.

3. In a stand mixer or medium bowl, beat the egg. Add the melted butter, buttermilk, and vanilla extract. Mix to combine.

4. Add the flour, sugar, baking powder, cinnamon, ginger, baking soda, and salt and mix just until combined. (don't overmix)

5. Spoon half of the batter into 9 of the muffin cups. Evenly divide the filling and pour it onto the batter. Finish by spooning the other half of the batter on top of the filling.

6. Bake in the preheated oven for 20-22 minutes. (or until a toothpick inserted comes out clean)

Enjoy!

Tuesday, January 10, 2017

{Instant Pot} Baby Food

Hello!  Jana here with a tutorial for how to easily make baby food in the Instant Pot!  My fourth child is 6 months old, so we are in the early stages of eating table food. Making your own baby food is beneficial for so many reasons!  First of all, it is the most inexpensive way to feed your baby. An entire bag of organic baby carrots (32 ounces) costs $3.48 in my area. From my research, non organic jarred carrots would cost about $1 for two 2.5 ounce containers. As you can see, you can get a higher quality food for much cheaper when you make it yourself!  Some of you might be thinking that the time it takes to make the food isn't worth the cost savings. I can assure you, that it only takes minutes to prepare the food.  Below, I am going to show you an example of making carrots using the Instant Pot. There are many other foods that could be prepared in a similar way, including the following:

Green Beans (using a steamer basket instead of a trivet)
Peas (using a steamer basket instead of the trivet)
Apples
Pears
Squash (peeled first)

From my experience, homemade baby food is much more flavorful, which makes it more fun for baby to learn to eat!  I like that you can add more or less water, depending on what stage of eating your baby is in. You can also begin to mash instead of blend once your baby gets older. I also like to start adding spices (cinnamon, garlic, etc) to foods once my baby gets older. (typically closer to 8 or 9 months) 

I will also discuss below how to store the baby food that you make.


To make the carrot baby food, I placed about 20 carrots on the trivet in the IP. I could have stacked them and done more, but I wasn't making a huge amount of baby food this time. Pour 1 cup of water or broth in the bottom of the IP. Close the lid, push Manual, and choose 4 minutes. You can do quick release or natural release once it is finished.
 

Add some of the water back in if needed (depending on how thick or thin you want the consistency for your baby), and puree. I used an immersion blender for this step, but you could also use a normal blender. I have found that if I make more baby food than what I will need for a few days (and can refrigerate), then freezing in some sort of ice cube tray works great!  I prefer silicone trays, because the food comes out much easier when frozen.  The trays I used above are a little bigger than the size I wanted, so I filled about halfway.


Once they are frozen, you can remove from the tray, and store in a Ziploc bag or other container in the freezer. Then, just remove the amount you are needing for the day, microwave, and you're ready to go!

Monday, September 12, 2016

German Lentils with Sausage

Becca here with a recipe (no photo, sorry, we ate it before I got a picture!) that my family really enjoyed.  I recently did a big freezer cooking session, and adapted this recipe to be both freezer and Instant Pot (electric pressure cooker) ready.  I have used an Instant Pot for many years; I'm actually on my second one, after the first had had an unfortunate incident with the plastic part of the lid coming in contact with the hot stove-top and melting.  When we had to leave our home last year and stay in a hotel for 60 nights, because of a water leak, my Instant Pot was the one thing from our kitchen I took with me to the hotel.  I love the popularity they have gained in the past few years; my newer model Instant Pot has several great features that my original one did not, one of them being the "saute" button.  This was my first time using saute, and I'm wondering why I haven't before.  I was able to brown the sausage, and then cook the meal all quickly, and in the same stainless steel (no toxic chemical non-stick finishes!) pot.  My family all really enjoyed this recipe, and our youngest son that is a new eater even had seconds, as did most of the kids!  The seasonings were delicious, and had just enough of a distinctly different taste, to make the recipe unique.

The recipe makes a generous portion; my family of seven, with several large appetites in the bunch, ate it for a meal once, and had enough to accompany lunch the next day, with the five kids and I each having a small portion.  I will include the directions for making up a double batch to keep in the freezer, as I did, below the recipe.


German Lentils with Sausage

1 pound dried brown lentils
Orrington Farms Chicken Base or 'Better Than Bouillon' (use package instructions, see amount needed for 10 cups of water)
1/2 teaspoon celery seed
1/2 teaspoon ground black pepper
1/4 teaspoon nutmeg
1 bay leaf
2 Tablespoons dried parsley
1/2 teaspoon garlic powder

10 cups water

4 cups grated carrots
2 Tablespoons minced garlic
1 teaspoon Worcestershire Sauce
21 ounces Kielbasa Sausage or Ham, diced

Place diced Kielbasa Sausage (or Ham) into the instant pot.  Stir on 'saute' setting until browned.

Add remaining ingredients, stir, and cook on meat/stew setting.

Enjoy! -Becca


To make ahead and freeze:
Multiply all ingredients times the number of meals you want to freeze.
Put top ingredient section (lentils, chicken base, and spices) into a quart bag, and label with recipe name.
In order, place the grated carrots, worcestershire sauce, minced garlic, and then diced sausage into a gallon bag, and label with recipe name.
To prepare the dish, follow the recipe above (the sausage needs to be on top of the freezer bag, so it can be browned first, before adding the other ingredients!)

Thursday, March 5, 2015

Fresh Orange Muffins


Jana here with a new muffin recipe!  My six year old son likes helping in the kitchen, and loves to suggest new recipe ideas. Recently, he asked me if I could make some orange muffins soon. I love to bake muffins, and had never tried any orange ones so I was up for the challenge!  I followed a recipe I found on www.food.com.  This website, along with www.allrecipes.com are great resources when you have an idea of something you want to bake, but want to read through ingredient lists and reviews. I loved that this recipe used fresh oranges, and the flavor is unbelievable!  The muffins are very moist, and the texture is awesome.  Another benefit is that the ingredient list is pretty short, so you can have these mixed up and ready to put in the oven in minutes!

Fresh Orange Muffins

2 medium sized oranges
1 large egg
1/2 cup butter, melted
1/2 teaspoon vanilla extract
1 3/4 cups all purpose flour
3/4 cup white sugar
1 teaspoon baking powder
1 teaspoon baking soda

1. Preheat oven to 400 degrees. Prepare a 12 cup muffin tin by lightly greasing.

2. Squeeze the juice from one of the oranges until you have 1/2 cup. If you don't get quite this much from the orange, add water to make the total amount 1/2 cup.  (I did this, and the muffins were still so delicious!)

3. Cut the other orange into bite sized pieces (peel included, but make sure to remove any seeds!). Blend the orange pieces with the orange juice until pureed. (I used my immersion blender, and it worked very well)

4. Mix this puree with the egg and melted butter until well combined.

5. Add the dry ingredients, and mix until just combined.

6. Use batter to fill muffin cups 3/4 full. Bake for 20 minutes, or until a toothpick inserted comes out clean.

Enjoy!!

Friday, June 13, 2014

Homemade Sandwich Bread (Bread Machine Recipe)


Jana here, and today I wanted to share my favorite homemade bread recipe!  I make it for our family's sandwich bread each week.  Well, since we have 5 people in our family, a loaf doesn't typically last a whole week...so I normally make this about every 4 or 5 days. That is about the length of time that the bread will stay fresh. If you know you won't be able to eat it in that time frame, I would slice the loaf and freeze it. Then, you'll be able to pull out enough for each day, etc. The bread maker that I have (and love) is the Panasonic SD-YD250.  I have used it consistently for months, and always had great results. I highly recommend it!  This recipe is modified from one of the recipes that came in a booklet with my machine. My mother-in-law has the same bread machine, and told me about some modifications she made to make this a great sandwich bread. I tried it, and we loved the results too!

Homemade Sandwich Bread

1 1/2 cups all purpose flour
1 1/2 cups whole wheat flour
1 tablespoon brown sugar
1 1/2 tablespoons powdered milk
1 1/2 teaspoons salt
1 1/2 tablespoons butter (I like to cut this into smaller pieces)
1 1/4 cups water
1 teaspoon yeast

For the bread machine listed above, this would require you to use the 'wheat' setting, and makes a 'medium' size loaf. I know all bread machines differ, but I think this recipe could be used in different machines!

Enjoy!

Wednesday, May 28, 2014

Layered Enchiladas {freezer friendly}


Becca here with a recipe I've made many, many times.  In fact, I nearly always have one of these casseroles in my freezer (photo is of them unfinished) because it makes a great, quick meal  with the addition of a salad or veggie.  With beans, meat, cheese, and corn tortillas, it has all the makings of a great Mexican meal, one that I know my kids will always enjoy eating.  Feel free to adapt the meat mixture to your family's preferences; you can easily make it extra spicy, use extra beef or beans, etc. to customize it to your family's tastes!  I adapted the recipe from "Fix, Freeze, Fast!"  Enjoy!

*And don't forget to enter our giveaway, on the Crustless Spinach Quiche recipe below.  It ends 5/30/14!


Layered Enchiladas

6 pounds ground beef
4 bell peppers, chopped and seeds removed (I like multi-colored peppers)
4 onions, chopped and seeds removed (I like purple onions)
6 cloves of garlic, minced
4 cups your favorite salsa or picante sauce
4 cups tomato sauce
12 cups cooked pinto beans (I use dry beans I cooked in the pressure cooker, canned is fine also!)
2 teaspoons cumin
2 Tablespoons salt (I use Real Salt)
60 small corn tortillas (I use 5 per layer, times 2 layers, per casserole)
12 cups shredded cheese (I prefer sharp, your favorite is fine!)
6 large baking pans, 9x13 size (I use glass, or love these pans from Sam's Club, 30 for $6.48!)
plastic wrap & foil


In a large stockpot, brown beef, bell peppers, onions, and garlic, until beef is no longer pink, stirring occasionally.  I have cooked this in the slow cooker on high for several hours also, chopping the meat and stirring the mixture every hour or so.

Drain meat to remove excess fat.  Stir in remaining sauce ingredients (salsa, tomato sauce, pinto beans, cumin, and salt).  I like to taste the mixture here and make sure I don't need to add more seasonings; if you're using canned beans they're going to be saltier than using dried beans, for example.

Line your baking pans up, and place enough of the meat mixture to cover the bottom of each pan.  I scoop it out with a 1 cup measuring cup, and usually use about 4 cups.

Top each casserole with a layer of corn tortillas; I use 4 whole, and one torn into half to cover the pan evenly.  Cover with 1 cup of cheese per baking pan.  Repeat the layers, finishing with cheese (meat, corn tortillas, cheese).

Cover finished, cooled casseroles with plastic wrap, and then foil.

Freeze until ready to use.  Then, defrost overnight in the refrigerator.  Remove plastic wrap and foil, and bake at 350 for 45 minutes, or until center is heated through, and the edges are bubbling.  Enjoy!


Wednesday, May 21, 2014

Goulash (Freezer Meal)


Jana here with a great weeknight meal that is easy to change up if you don't have the exact ingredients on hand!  You can easily switch out the type of pasta, beans, or tomato products!  I found the recipe for Goulash on this blog.  I followed their recipe fairly closely, and my whole family really loved it!  It would be great to make and eat the same night, or as a freezer meal. You could even double the recipe, so you could eat one for dinner and freeze the 2nd one!

Goulash

1 pound ground beef or turkey
1 can diced tomatoes
1 can tomato paste (6 ounces)
1 small can tomato sauce
2 cups uncooked elbow macaroni (I used whole wheat)
2 tablespoons Italian seasoning
1 can (15 ounces) corn, drained
1 teaspoon garlic powder
1 teaspoon onion powder
1/2 cup shredded cheese
1 can chili beans (optional)


1. Brown ground meat, and season with garlic and onion powder.  Drain and set aside.

2. Cook noodles according to package directions. Drain and set aside.

3. In a large bowl, combine tomato sauce, tomato paste, diced tomatoes, Italian seasoning, corn, noodles, and meat.

4. Spoon mixture into an 8x8 baking dish. (if making for a freezer meal, I think using the foil pans is one of the easiest ways to go!)  Top with the shredded cheese.

Bake at 350 degrees for 30-40 minutes, or until heated through.

Enjoy!

Thursday, April 17, 2014

Sweet Peach Muffins


Jana here with a great Summer muffin to try!  I have frozen peaches that I prepared when they were in season last year. I thaw those, and use them in this recipe. But you can use canned peaches, or fresh as well! Using the amount of ingredients I have listed below, this will make about 18 muffins. I like to make a big batch like this, and then put them all in the freezer. It's a great way to pull out the number you need each morning, and not have any muffins go bad. I found inspiration for this recipe here.

Sweet Peach Muffins

3 cups all purpose flour
1 cup sugar
4 teaspoons baking powder
1 teaspoon ground ginger
2 teaspoons ground cinnamon
1/2 teaspoon salt
2/3 cup vegetable oil
2 large eggs, lightly beaten
1 cup milk
2 teaspoons vanilla extract
2 - 2 1/2 cups peaches, peeled and diced (with most of the juice drained)

1. Preheat oven to 400 degrees. Prepare muffin tins by spraying with oil or spreading a thin layer of butter.

2. In a large bowl, mix the flour, sugar, baking powder, ginger, cinnamon, and salt until well blended.

3. In a separate bowl, combine the oil, eggs, milk, and vanilla extract.  Add the wet ingredients to the dry, and stir until combined. Fold in the peaches.

4. Divide the batter between 18 muffin tins. Bake for 15-20 minutes, or until tops are golden brown, and a toothpick inserted comes out without batter.

Enjoy!

Monday, March 10, 2014

Food Prep Day


Friends, I've had a revolution.  A food revolution of sorts.  It started a few weeks ago when I read my friend Natalie's post about her grocery budget and making your own chicken/vegetable stock.  I was intrigued.  I am always working towards healthier/more efficient ways for me to prepare food for our family.  By very consciously considering what I'm putting into my body I'm feeling healthier than I have, ever.  Like, even in my 20's.  It feels fantastic (more on this later) and so I've been spending a lot of time lately on meal planning.  One day this week I decided to accomplish a lot of food prep, like making these breakfast burritos that could be frozen for the rest of the week.  
I also took Natalie's advice and have been saving all of my vegetable scraps when I'm cooking, in a freezer bag.  I put them in the crockpot along with some spices and let it cook all day long.  The easiest, tastiest, vegetable broth ever.  I love that I knew exactly WHAT was in my vegetable broth when I made soup with it last night!  No guessing or worrying about what was really inside the cardboard carton from Wal-Mart.  
I also placed a whole chicken in the big crock pot this day, with spices rubbed on and an onion diced and placed in the crockpot.   I cooked this on high all day long.  It smelled fantastic! 

Once it was done cooking I let the chicken cool down and took all the meat off the bone.  I will either use this for cooking this week or put the rest in the freezer.  Then, I put the bones/skin/etc. back in the crock pot, along with some diced veggies (carrot, onion, celery) and a few spices and left it overnight.  

This made the most excellent chicken broth I was able to wake up to the next morning!  
Mind. Blown. 
(why haven't I been doing this before? It is so, so much cheaper and healthier than buying the carton broth!)
If you eat a lot of black beans (we do!) then buying a bag of dried black beans and cooking them on the stove top is so much cheaper than buying a bunch of cans of them.  You simply fill your pot with water and pour the beans in. Then simmer for a couple of hours and you're done! 

I also made breakfast burritos this same day.  It was very easy to get the vegetables and chicken going in separate crock pots while the sausage and vegetables cooked for the burritos.  I cooked 2 sweet potatoes (diced), a pound of breakfast sausage, one zucchini, and onion together in the skillet.  I also threw in some frozen peas and carrots towards the end.  Then I placed some of the filling in whole-wheat tortillas, sprinkled with cheese, and rolled them up.  I wrapped each of them in foil first, and then placed inside a Ziploc bag to store in the freezer! 

They are so good.  I just reheat them for a minute or so in the microwave. :) 
(note to self-include eggs next time! In my productive rush, I forgot)


These are the frozen veggies I put in the little crock pot to make the broth.
Wondering what the little girls were doing while I cooked?  Getting into things in the craft room is what! 
Or doing this.
So the chicken ended up making 3 huge Mason jars of chicken broth, plus all the meat! 
For $5.99.
Friends, that is a deal.


Yummy.

This food prep day took a lot of work.  It was very time-consuming and I realize I could have just bought most of the things I spent making. 

But, hear me out.  I ended up with food and broth that I feel safe using because I know the source they came from.  I ended up with a LOT of food and broth because I took the time to do it myself. 

I'm finding (typically speaking) when I rush my health and stay up too late and don't eat healthy and don't exercise I end up with more free time, more yucky tummy issues, and more sluggishness.

When I take time and slow down for my health and prepare meals, go to bed early, exercise each night, I end up with more energy, no tummy issues at all, and better quality free time. 

I'm hoping to include more of these food prep days in my routine in the future! 
Do you prep food like this?

Friday, October 25, 2013

Honey Oat Granola Bars


Jana here with a new snack recipe that your family will love!  My husband and I like to work on new recipes together sometimes, and enjoy making things together in the kitchen. (such as Slow Cooker Applesauce and baking your own pumpkin!)  Once in awhile, he will get an idea of a food he would like to make, and he starts a 'kitchen experiment'!  His creations are always yummy, and I'm so glad he likes to create in the kitchen too!  This recipe will make approximately 30 bars, and they freeze well!  If you cut them into 30 bars, each bar will be approximately 115 calories.  If you have frozen the granola bars, and want to pull them out to eat soon after, I recommend putting them in the microwave for a few seconds to quickly soften them.

Honey Oat Granola Bars

4 cups quick cooking oats
1 cup packed brown sugar
1/2 cup sunflower kernels (I prefer unsalted)
1/2 tablespoon cinnamon
3/4 cup butter or coconut oil, melted
2/3 cup honey
1 teaspoon vanilla extract

*Variation options include 1/2 cup baking chips, or other nuts to supplement or replace sunflower seeds. (up to 1 cup nuts)

1. Preheat the oven to 350 degrees.  In a large mixing bowl, combine oats, brown sugar, sunflower kernels, and cinnamon.  Stir in the butter, honey, and vanilla until well combined.  (Mixture will be crumbly)  Press into a greased, parchment paper lined baking sheet. (approximately 15 in x 10 in x 1 in)

2. Bake at 350 degrees for 15-20 minutes, or until granola is becoming lightly browned and bubbly.  Cool for 15 minutes on a wire rack, then cut into bars. Cool completely before removing from pan.

Enjoy!

Friday, October 11, 2013

Slow Cooker Applesauce


Jana here with a recipe that we love to make when Fall has arrived!  We purchased apples from a local orchard, and bought the 'seconds'. This meant that some may have a small spot or two on them, or they were irregular in size or shape. We bought a bushel and a half, and it averaged out to about 50 cents per pound of apples!  I buy natural (no sugar added) applesauce often at the grocery store, so this is a great savings for our family, and something we enjoyed making together!

Slow Cooker Applesauce

Apples of choice, peeled, cored, and sliced
water
sugar (if desired)

1. Depending on the size of your slow cooker, prepare the apples as described above, and fill your slow cooker to the top. Add approximately 1/2 cup water to a standard/large slow cooker.  If you would like to add sugar, I would suggest starting with 1/4 cup - 1/2 cup. 

2. Cook the apples on high for one hour, then turn to low and cook for 2-3 hours. A great way to tell when the apples have cooked long enough is when you start seeing 'frothy' looking bubbles at the top. Stir the apples, and make sure they are soft.

3. We ran ours through a foley food mill to remove any peel or seeds that could have been accidentally added. It also achieved great texture for our applesauce!  If you don't own a foley food mill, mash the apples with a potato masher, and stir well. After doing this, if you want a smoother texture for your applesauce, put it in a blender on low speed for a short time.

*We put our applesauce in quart sized Mason jars, and freeze it. Make sure to leave some room at the top of your jar.

Enjoy!

Friday, September 20, 2013

Broccoli, Ham, & Egg Bake


Jana here with a delicious and healthy meal that makes plenty for leftovers!  I like to make 'breakfast recipes' for dinner, just to change things up. (like one of my all time favorites, this Spinach & Bacon Frittata)  This recipe uses a 9x13 dish, and the food is pretty filling since it has ham and eggs for protein. Because of this, my family was able to eat it for dinner one night, and also have it for breakfast later in the week. I think you could use this idea in muffin tins also, and freeze the muffins to pull out for individual breakfasts as you needed them! I found inspiration for this recipe here.

Broccoli, Ham, & Egg Bake

4-6 cups small broccoli florets (fresh or frozen)
1-2 cups diced ham
1 cup mozzarella cheese, shredded
8-10 eggs, beaten
1/2 teaspoon onion powder
1/2 teaspoon garlic powder
1/4 teaspoon nutmeg
salt and pepper to taste

1. Preheat oven to 375 degrees. Grease a 9x13 baking dish.

2. If using frozen broccoli, thaw. Once thawed (or if using fresh), blanch the broccoli for 2 minutes. (cook in boiling water, then drain)

3. Layer the broccoli in the bottom of the baking dish, then the diced ham. Sprinkle the cheese on top.

4. In a small bowl, beat the eggs well. Add the seasonings, and stir until well combined. Pour the egg mixture evenly over the ham in the baking dish. Use a fork to 'stir' the mixture if you need to spread the egg mixture around a bit.

5. Bake 35-45 minutes, or until the egg mixture is set, and starting to brown.

Enjoy

Wednesday, September 11, 2013

Swimming Rama {Freezer Friendly, Makes 3 meals}


Becca here with a recipe I'm so excited to share with you!  Although it isn't really much to look at, my husband said that he likes it better than his favorite Thai Restaurant, and we had it three times in one week!  Yes, it really is just that tasty!  Plus, it has a short ingredient list, and is both gluten free and dairy free.  Like I said about another of my family's favorites, also freezer friendly, Chicken Curry, this is a great introduction to curry.  Not too spicy or 'weird' tasting, but definitely distinctive and delicious!  Side note, curry isn't an actual spice like cinnamon or basil, it is a mixture of spices that can range in color anywhere from a deep yellow, to orange, to a deep red color, depending on the region of the world that it is from.  Each obviously has a very distinct flavor, and most do have dried chilies, but "curry" can mean a very wide range of things.  As for the name Swimming Rama, I wasn't able to find an origin or meaning, other than it is a traditional Indian chicken dish, made with a red curry, peanut and coconut sauce.  This is a recipe I really hope you'll try, and not let the unique name or short ingredient list scare you off, for the price of one entrée at your local Indian Restaurant, you can have an entire dinner to feed your family, and it tastes just as good!  My inspiration recipe was from Fix, Freeze, Feast.  Enjoy!

Swimming Rama
{freezer friendly, make 3 meals}

8 cups cooked chicken
1 jar (4 ounces) Thai Kitchen red curry paste *see note below
3 cans coconut milk
1 Tablespoon honey
1 Tablespoon salt (I use Real Salt)
1 1/2 cups peanuts, crushed (I put them into a zip top bag and hit them with a rolling pin)
9-12 cups cooked brown rice
For Serving:
1-2 cups of fresh spinach per family meal

Combine sauce ingredients (cooked chicken, red curry paste, coconut milk, honey, and salt) into large saucepan, and cook over low heat, stirring occasionally, until just beginning to boil.  Remove from heat.

For serving immediately, layer cooked rice, a handful of spinach, and then chicken sauce to cover.  Top with crushed peanuts, and serve.

For freezing, let chicken sauce cool to room temperature, and divide into thirds in gallon zip top bags.  Add 3-4 cups cooked rice, if desired (I have frozen the ingredients together and separate, both work fine.  Freezing them separately makes a neater presentation, but it tastes great either way!).  Place a smaller bag of 1/2 cup of crushed peanuts with it (I like to staple the bags together through the top above the zipper).  Defrost in the refrigerator overnight, and follow above instructions to heat and serve.

*Note on red curry paste - Thai Kitchen is the most widely available red curry paste, carried by Walmart, etc. on the aisle with Asian foods.  However, it is a very mild curry paste.  If you're using another brand, I would start with 2 Tablespoons and taste the sauce before increasing the amount of red curry added.

Tuesday, September 3, 2013

Freezer Friendly Coleslaw


Becca here with a yummy coleslaw recipe that's great to make for a crowd, or to freeze some for later!  And yes, at first I was skeptical about freezing coleslaw too, but it really does work!  I will note that if you use a coleslaw mix containing purple cabbage, the natural color in the cabbage will turn all of the coleslaw a bit purple, but it really does taste great!  This is more of what I would consider a "German Style" coleslaw, more vinaigrette based, as opposed to more mayonnaise based, creamy, "American Style" coleslaw.  This coleslaw would make a great side dish that is easy to transport to a picnic, family gathering, church potluck, etc.  Or you could have a German Food night and serve it with one of my favorites, German Bratwurst Dinner in the Slow Cooker.  The celery & mustard seed is what gives it the distinctive coleslaw flavor, so be sure and don't leave it out! You can use those same seeds to make easy homemade refrigerator pickles also! My family really enjoys this coleslaw, I hope yours does too!

Freezer Friendly Coleslaw

2 pound bag of coleslaw mix
1/4 cup dehydrated onions (or 1 large onion, minced)
2 cups white vinegar
1/2 cup water
2 teaspoons mustard seeds
2 teaspoons celery seeds
1 1/2 cup sugar

In a large saucepan, combine vinegar, water, mustard seeds, celery seeds, and sugar.  Bring to a boil, stirring occasionally.  Let boil for one minute.

Let cool to room temperature (or in the refrigerator overnight).  Give it a stir, and then pour vinegar mixture over cabbage, stirring well to combine.

Serve immediately, or refrigerate until ready to serve.

Alternatively, store in airtight container in the freezer, defrosting in the refrigerator the night before ready to use. 

Friday, August 2, 2013

Easy Tuna Patties


Jana here with a great summer recipe!  There are several reasons why I like this particular recipe. First, it is great for the budget!  Canned tuna is a very inexpensive source of protein, and all of the other ingredients are cost friendly.  You cook these on the stovetop, so you don't have to heat up your oven (and house) during the warm summer months.  These are very easy to prepare. The total time for making them, which included prep and cooking, was under 15 minutes.  My whole family liked these, even my 10 month old baby!  They are good dipped in ketchup, mustard, or ranch. I got the recipe inspiration from All Recipes.

Easy Tuna Patties

2 eggs
2 teaspoons lemon juice
1/4 cup grated Parmesan cheese
3/4 cup Italian seasoned bread crumbs
3 (5 ounce) cans tuna, drained
1 pinch ground black pepper
3 tablespoons oil (canola or olive)

1. Heat oil in a skillet over medium heat.

2. Beat eggs and lemon juice in a bowl. Stir in Parmesan cheese and bread crumbs until combined.  Add tuna, and stir well.  Add black pepper and stir.

3. Shape tuna mixture into patties, making approximately 6-8.

4. Fry patties until each side is golden brown, about 5 minutes on each side.

Enjoy!
Wednesday, July 31, 2013

The Best Homemade Pizza Sauce {freezer friendly, makes 1 gallon}

Becca here with a really yummy pizza sauce recipe.  I have tried lots (LOTS) of different pizza sauce recipes and combinations over the years, and many were fine, but I couldn't ever get it just perfect.  My husband requested a really thick pizza sauce, and we like one with lots of flavor.  I wasn't happy with the way some came out too thin and ended up making the crust soggy.  If you think you have trouble getting a good homemade pizza crust, in my experience, the sauce and baking time, temperature, and method have more to do with it than the actual crust recipe.  But we finally have a winner, one that the whole family loves, and my husband (finally) said is a keeper.  I got the original recipe off of the back of the can of tomato paste, although I did tweak it a bit.  I've also added a splash of balsamic vinegar and a can of diced tomatoes to a couple of cups of the pizza sauce to make a tasty marinara sauce for pasta.  Enjoy!

The Best Homemade Pizza Sauce
*makes 1 gallon

1 huge can tomato paste (111 oz.)
2 quarts water
1 Tablespoon granulated garlic
1 Tablespoon onion powder
1 Tablespoon lemon juice
2 Tablespoons black pepper
2 Tablespoons salt
2 Tablespoons oregano

Combine all ingredients in large stockpot.  Stir well to combine.  Cover, and simmer over medium low heat, stirring occasionally, 20 - 30 minutes.  Use immediately, or let come to room temperature and then freeze in serving size containers.  (I usually freeze in 2 cup portions).

*To make a red sauce for pasta, I just add a can of diced tomatoes & a couple of splashes of balsamic vinegar to 3 cups of pizza sauce.

Wednesday, July 3, 2013

Oatmeal Mango Coconut Cookies {freezer friendly, makes 6 dozen}

Becca here with another great recipe to help keep your freezer stocked with quick-to-fix meals.  I've mentioned many times before here that when I'm cooking, I like to make at least double, and often triple or quadruple a recipe, since it usually just dirties the same amount of dishes, and takes significantly less time than preparing the same thing multiple times on different days.  Rare is the day when I make just one meal, loaf of bread, or batch of cookies.  I particularly love doing this with cookie recipes for portion control!  I personally freeze them in batches of twelve, a nice amount for my family of 6, and perfect size for my baking sheet, 3x4.  You can freeze the cookies baked or unbaked, and many things I do bake first, but cookies you just can't beat the fresh out of the oven taste, so I freeze them unbaked.  These are a definite family favorite around here, and are a huge upgrade from the traditional oatmeal raisin cookie, in my opinion anyway!  The combination of coconut and mango is delicious.  Feel free to throw in some of your favorite nuts if you refer a bit of crunch in your cookie, although I think they're perfect just like this.  The recipe is very similar to one found in Fix, Freeze, Fast, one of my favorite cookbooks!

Oatmeal Mango Coconut Cookies
{freezer friendly, makes 6 dozen}

2 cups butter (4 sticks)
2 cups dark brown sugar*
2 large eggs
4 teaspoons real vanilla extract
3 cups flour (I use 'whole wheat' hard wheat I grind myself)
3 cups old-fashioned oatmeal (not quick oats!)
1 cup unsweetened shredded coconut (often found in the freezer, sweetened is fine too if you prefer)
1 cup chopped dried mango (about 8 ounces)
2 teaspoons baking powder
1 teaspoon salt

Using a mixer, cream butter, sugar, eggs, and vanilla until smooth.  Add in remaining ingredients (flour, oatmeal, coconut, mango, baking powder, and salt), and combine well.

Refrigerate dough for 1 hour, or until firm enough to roll into balls.

Roll dough into 1" balls and freeze in portions you prefer.  I place them into a quart zip top freezer bag laid flat, being careful not to squish the cookie balls or press them into each other until they're frozen hard, you want to be able to easily separate them when you're ready to cook them!

To bake:  For absolute best results, thaw fully in refrigerator first.  If you're like me and don't usually remember to do this, they are still great, I would just recommend cooking them on a silicone 'silpat' type mat.  Bake at 350 for 14-16 minutes.  You want them to just be starting to turn golden brown around the edges, and 'set' in the middle, don't overcook!

Enjoy!

Wednesday, April 24, 2013

100% Whole Wheat Banana Pancakes


Becca here with a recipe my family really enjoys! I doubled this recipe to ensure that we had extras for the next day.  I love making extra pancakes so the kids or I can just pop into the toaster in the morning to reheat for a quick & healthy breakfast.  I store them in an airtight container in the refrigerator for up to three days.  If it's going to be longer than that before they're eaten, I freeze them until we're ready to use the pancakes.  Enjoy!

100% Whole Wheat Banana Pancakes

4 cups whole wheat flour (I use hard spring wheat I ground in my Nutrimill, your favorite whole wheat flour is fine)
4 teaspoons baking powder (aluminum free is best)
3 teaspoons baking soda
1 teaspoon salt (I use Real Salt)
2 Tablespoons honey
4 large eggs
3 1/2 cups milk (I use whole milk, but your family's favorite should be fine)
4 Tablespoons coconut oil or melted butter, plus a little extra for the griddle (I've used both, and they either works great!)
4 large ripe bananas, mashed
100% pure maple syrup or honey for serving, optional

In a large bowl, combine dry ingredients - flour, baking powder, baking soda, and salt.

Make a well (hole) in the center of the flour mixture and pour in the wet ingredients - honey, eggs, milk, and melted butter. 

Stir all ingredients together thoroughly, but don't over mix. 

Gently fold in the mashed bananas.

Use a 1/4 cup measuring cup to pour pancakes onto a griddle or large skillet over medium-high heat (I heat my griddle to 325).  Flip when the edges are beginning to turn golden brown, and there are bubbles throughout the pancakes. 

Serve with maple syrup or honey if desired.

Wednesday, April 17, 2013

100% Whole Wheat Hamburger Buns {freezer friendly - makes 15 buns}


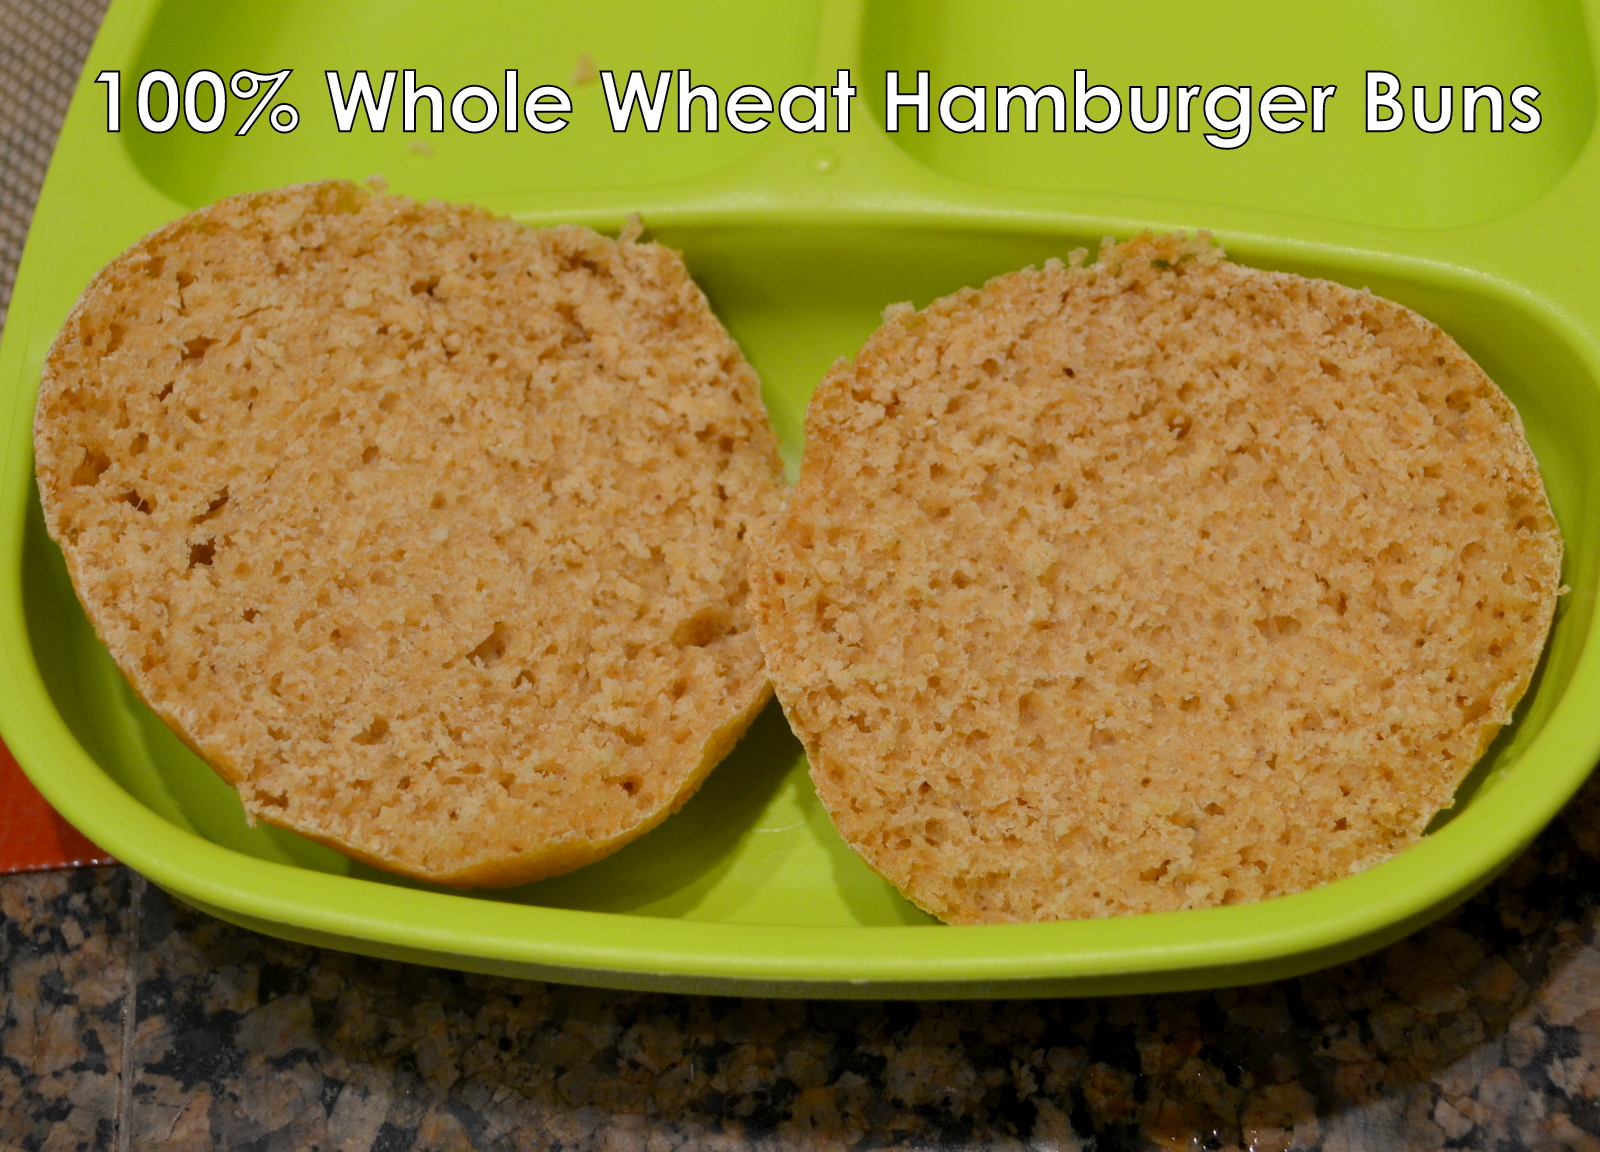
Becca here with a recipe I was thrilled to discover!  We enjoy eating the occasional hamburger at home, but the healthier hamburger buns can be quite expensive, and still have a few questionable ingredients.  This recipe was the first one that we've really loved!  I doubled the original recipe, and use it to make 15 hamburger buns.  We eat some that day, and I freeze the rest, unbaked, in 2 separate bags so they're ready to set out to rise and bake later.  This dough is very, very easy to work with, and makes a nice soft, but sturdy (and tasty!), bun.  Be sure and slice them, as you should all homemade bread products, with a serrated knife so you get a nice clean cut.  I've described the steps in pretty great detail, but the buns really do come together quickly, the hands on time is quite minimal, and they are SO tasty!!  I make these into a nice dinner portion hamburger bun for a nice 'normal' sized hamburger, without a ton of extra bread left on the edges without meat, as you can see above (these are pictured on a half sheet sized baking sheet).  If you're wanting restaurant sized hamburger buns, I would divide the dough into much larger portions.  The dough should double in size from what you started with, so use that to gauge how big you want them to be.  Baking time will just be a minute or two longer.  Enjoy!

100% Whole Wheat Hamburger Buns
{freezer friendly - makes 15 buns}

1 1/2 cup warm tap water
6 teaspoons yeast
4 Tablespoons honey
4 Tablespoons melted butter
2 large eggs
2 teaspoons salt
5 - 6 cups whole wheat flour (I use organic hard white wheat I mill)

In a large mixer bowl, combine warm water and yeast, and allow to sit for 5 minutes.  (Mixture should be starting to bubble at this point if your yeast is good!)

Add honey, melted butter, eggs, and beat until smooth.  Add 5 cups of the flour and salt and beat until smooth.  Add remaining flour (generally up to 1 additional cup, 6 cups total) until the dough is smooth and workable, not sticky.  Knead (I let the mixer do this part with a dough hook!) for 6 minutes.

Cover the dough and let it rest for 10 minutes.

Roll dough into a log type shape and cut into thirds.  Divide each into desired number of buns; I divide each third into five, one for each member of my family.  Quickly form them into a bun shape (this doesn't have to be perfect, they're going to rise quite a bit & get a nice smooth dome on them!).  Place the number you're going to bake today onto a greased cookie sheet.

*I prefer to freeze this dough raw, and let it rise & bake 'fresh' the day we'll be eating the buns.  Place buns that you'll be baking another day into freezer bags, squeeze as much as as possible out, and place into freezer.  See below for finishing instructions from the freezer.

Let the buns rise in a warm spot about an hour; they should double in size.  If it's a particularly cool day, I put my oven on the 'warm' setting (100 degrees) for a few minutes, then turn it off and let them rise in there. 

Bake at 350 degrees for 15 minutes, or until golden brown.  Enjoy!

*From the freezer, remove bag of frozen buns and let defrost in the refrigerator overnight.  Place buns onto greased cookie sheet, and place into warmed (I heat mine to 100 for a few minutes, then turn it OFF) oven for about an hour, or until dough has doubled in size.  (the dough shouldn't start to 'cook' or change color much at all, your spot is TOO warm it that happens, move them somewhere a bit cooler :) Bake at 350 for 15 minutes, or until golden brown.

And, because I know everyone always loves a good 'inside' shot, here's what one looks like cut open :)