Showing posts with label Holidays. Show all posts

Friday, January 20, 2017

Maple Popcorn


Jana here with a delicious treat that I made recently!  I found myself wanting to make my family a special snack recently on a Saturday, so I pulled out one of my cookbooks, The Homemade Pantry, and made this Maple Popcorn (with a few modifications). It takes an hour to bake, so keep that in mind when you are thinking of making it. It is SO worth the time though. The results are a popcorn that is sweet, lightly crunchy, and so good! 

Maple Popcorn

1/2 cup popcorn kernels
1/2 cup butter
1/2 cup maple syrup
1/4 cup cane sugar
1/2 teaspoon salt
1/2 teaspoon baking soda
1/4 teaspoon vanilla

1. Butter a large bowl, and a 9x13 glass dish. Preheat the oven to 250 degrees.  Pop the popcorn (instructions here). Once it has finished popping, pour it into the buttered bowl.

2. In a medium pot over medium high heat, combine the butter, maple syrup, sugar, and salt. Stir until combined. Once it has reached a boil, let it boil for 5 minutes without stirring. When the 5 minutes is done, add the baking soda and vanilla. Remove from the heat.

3. Slowly (a 1/2 cup at a time) drizzle the maple sauce onto the popcorn. Don't pour too much too quickly, or it will cause the popcorn to deflate. After you have poured the first amount of sauce, stir the popcorn to distribute the sauce. Repeat these steps until all sauce is on the popcorn.

4. Pour the popcorn into the 9x13 baking dish, and put into the oven. Bake for 1 hour, taking it out to stir every 15 minutes. Cool before eating.

Monday, January 16, 2017

Honoring Martin Luther King Jr. Day {with Children}

Becca here with some ideas to help honor Martin Luther King Jr. Day, with your children.  Several of the resources we use are available online, so even if you don't have a plan for today yet, you can still easily add one of the audiobooks, videos, or activities into your schedule!

These are books we own and love.

Riding to Washington is a fictional story told from the perspective of a young girl riding the bus to hear Martin Luther King Jr. speak in Washington DC.  "As the bus travels across cities and farm fields to its historic destination, Janie discovers firsthand the injustices that many others are made to endure.  She begins to realize that she's not so different from the other riders and that, as young as she is, her actions can affect change."

First Facts about American Heroes is a factual synopsis of various lives that have impacted our history.  I like that it has highlights of their life in a bulleted list, a nice, full page photo (or drawing if photo wasn't available at the time), excerpts of their famous words, etc.  All on two facing pages.

Who Was Martin Luther King. Jr.? Is from one of our favorite series.  Although my kids' don't love the look of the cartoonish covers, and think they seem a bit disrespectful, we have read and/or listened to dozens of books in this series, and we all learn something new.

10 Days, Martin Luther King Jr., highlights what the author considers to be the ten most critical days of Martin Luther King Jr.'s life, from 1944, to 1983, when today became a national memorial day in his honor.  I would say it is a 3rd grade or so reading level.


Other resources we are using include:

Who Was Martin Luther King Jr.? Audiobook (we have previously listened to, and recommend)

An American Girl Story: Melody, 1963 (we have not watched yet, but I have heard several glowing recommendations). It is on Amazon, and free to everyone to stream today.

Reading Rainbow Martin Luther King Jr.  (Includes storytime, as well as information and photos from the time period)

Martin Luther King Jr. "My Own Two Hands" Blank Printable 

Lots of great and free Martin Luther King Jr. Printables on a Variety of Skill Levels (this is my favorite website for meaningful printables, that are more than just "busy work"

Kid President on Martin Luther King Jr.

Friday, December 2, 2016

Honey Cranberry Upside Down Cake


Becca here, with a recipe that caught my eye while flipping through the December Food Network Magazine.  It was actually on an advertisement for Garnier Hair Products; I tried to track down the recipe online to give credit for my inspiration to someone, but couldn't find it.  I modified the original recipe quite a bit, to make it both more nutritious, and safe for everyone in our family to eat, since all dairy and corn products are an issue for one of our children.

I'm not a huge dessert person typically, but I LOVE this cake.  It has a different taste than I've had before, but one that is absolutely delicious.  It has the complex sweetness of the honey, and the tartness of the cranberries combined, as well as the different textures in the cake and topping. Just one quick note - make sure that you don't leave it in the cake pan more than the 20 minutes specified!  Also, mine sunk a bit in the middle here because I placed it on a regular sloping dinner plate; for a great presentation, it would do best on a completely flat platter.

Honey-Cranberry Upside Down Cake

Topping:
3 Tablespoons coconut oil, plus some for the pan (or coconut oil spray)
1/2 cup honey
1 pinch salt
3 cups fresh or frozen cranberries
the zest of one orange

Cake:
1 1/2 cups whole wheat flour (I use King Arthur, or grind at home from wheat berries)
1 1/2 teaspoons baking powder
1/4 teaspoon baking soda
1/4 teaspoon salt
6 Tablespoons coconut oil, soft or melted
1/4 cup granulated coconut sugar
2 large eggs
2/3 cup honey
3 teaspoons real vanilla extract

Preheat oven to 325 F.  Grease bottom and sides of a 9" circle cake pan with coconut oil, or coconut spray.

In a medium saucepan, place first 3 topping ingredients (coconut oil, honey, and salt).  Bring to a boil, on medium high, stirring occasionally.  Boil for 3 minutes, stirring occasionally, then add the cranberries & orange zest & turn the heat off.

In a large bowl, combine dry cake ingredients (flour, baking powder, baking soda, and salt).

In a separate bowl, whisk coconut oil and coconut sugar until thoroughly combined.  Whisk in eggs, and then honey and vanilla extract.

Whisk the wet ingredients into the dry ingredients, gently, until combined.

Pour warm topping into cake pan, spread evenly.  Pour cake batter on top, and gently spread evenly.

Bake at 325 F for 35-40 minutes.  Let cool in the pan 20 minutes.  Then, gently run a butter knife around the edges of the cake, place a plate or platter on top, and flip it over to remove the cake.

Serve warm, or at room temperature, with whipped cream or ice cream, if desired.  Enjoy!

Wednesday, September 7, 2016

Dairy Free, 100% Whole Wheat, Chocolate Cake

Photo credit Sister Sara :)

Becca here, with a recipe that I was super excited to experiment with, and make.  My youngest son has had some significant health issues that impacted his eating, so until a few months ago, he was still on formula exclusively, without any safe foods.  For his 1st Birthday, we weren't able to have any kind of cake, I froze his formula into a popsicle shape, because that's all he could have.  So, now that he has a lot of safe foods, we were super excited (ecstatic may be a better word!) to make him his 1st Birthday Cake, for his 2nd Birthday.  I did a lot of research on cake recipes, since it was important to me that it tasted good, I wanted him to be able to eat the same cake as everyone else, that it was dairy and corn free, and 100% whole wheat.  I settled on a variation of a Crazy Cake, a depression era cake that doesn't use eggs, butter, or milk.  I was really pleased with the way the cake turned out, and several party guests without dietary restrictions commented on how much they enjoyed it also.  I definitely don't think it tasted "healthy" or "dairy free"; it was very moist, and had a great flavor.  An unexpected bonus, was that you actually mix the cake up in the 9x13 pan, so there isn't a mixing bowl to wash also!!

I will be sharing the dairy-free "buttercream" recipe on the blog soon as well.


Dairy-Free, 100% Whole Wheat, Chocolate Cake

3 cups whole wheat flour (I recommend King Arthur brand, or grinding your own, the results are significantly better I think!)
2 cups sugar (I use unbleached, cane sugar)
1 teaspoon salt (I use "Real Salt" or Pink Himalayan)
2 teaspoons baking soda
1/2 cup unsweetened cocoa powder (I like a dark or dutch cocoa powder, and fair trade is important to our family as well)
3/4 olive oil
2 Tablespoons white vinegar
2 teaspoons vanilla extract (we make our own in large batches).
2 cups tap water

Preheat oven to 350 degrees F.

Sift flour, sugar, salt, baking soda, and cocoa powder together in an ungreased, 9x13 glass baking pan.

Make three wells.  Pour oil into one, vinegar into the second, and vanilla into the third.

Pour cold water over everything, and stir well with a fork.  Be sure to scrape the edges and bottom, and make sure it is thorougly mixed.

Bake at 350 for 30-40 minutes, or until toothpick inserted into the center comes out clean.

Store, covered, in the refrigerator.  We thought it tasted just as good, or maybe even better, the second day.

Monday, December 2, 2013

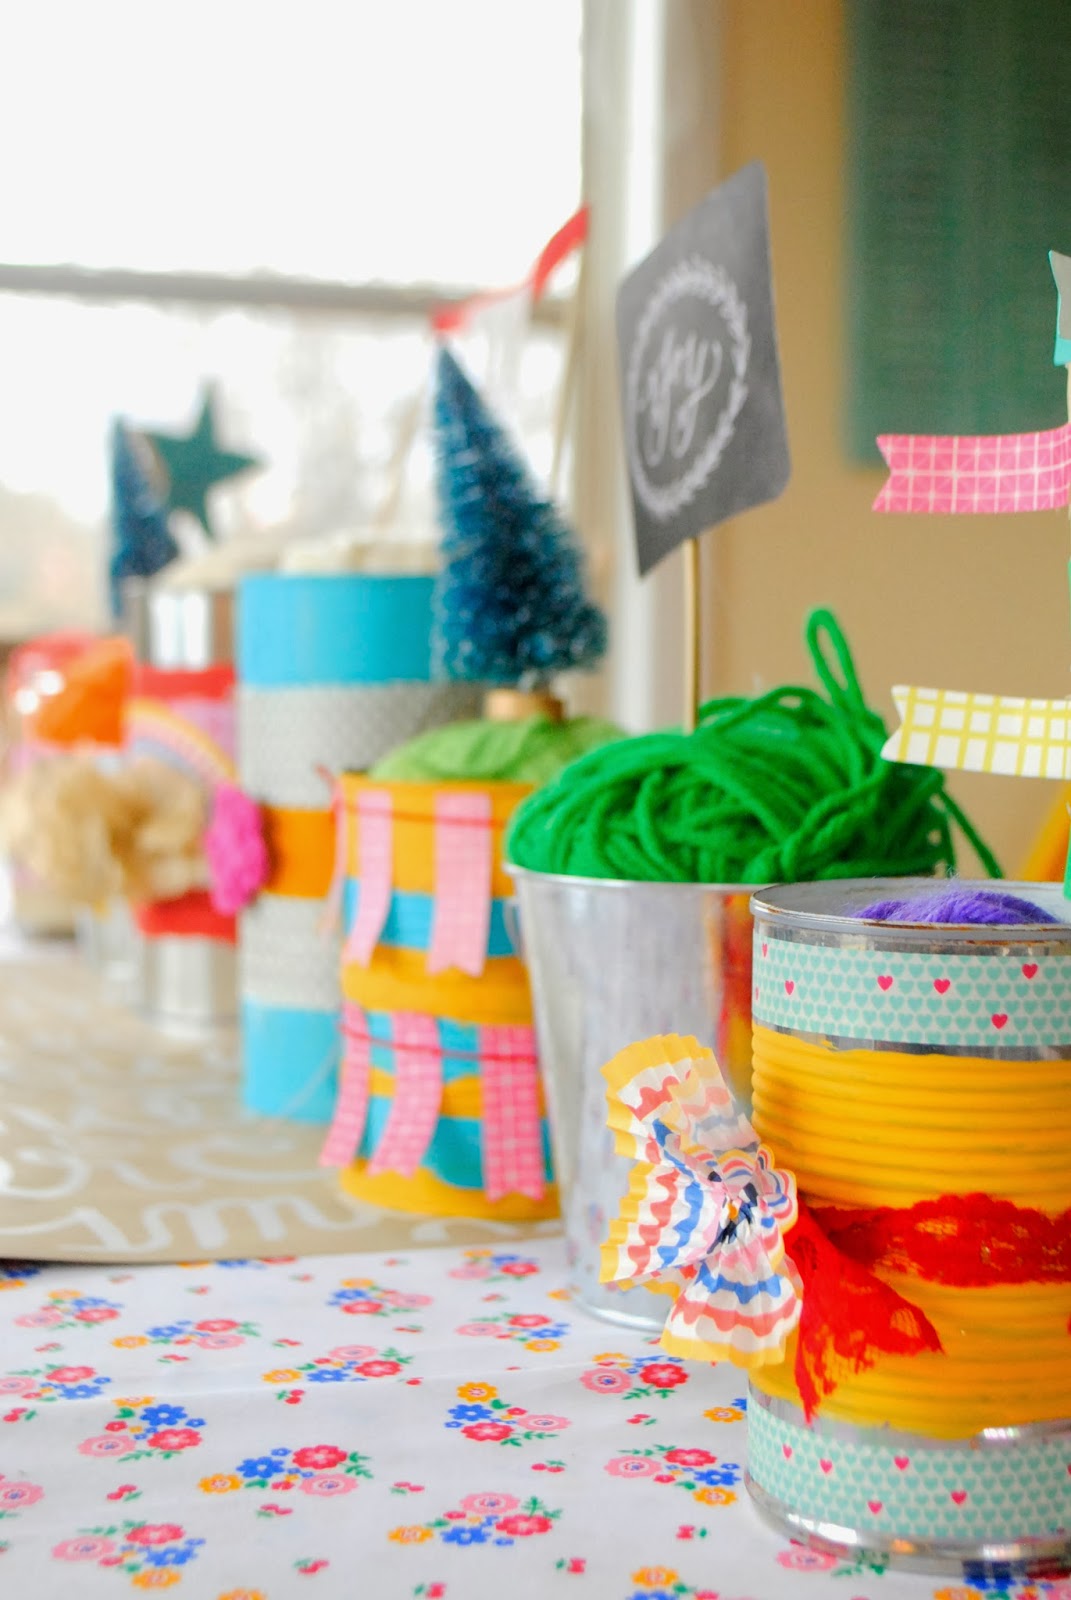
Decorative Cans (DIY)


I am so excited about this project today! To me, a perfect kind of craft is one where the sky is the limit, and money is not a limit.   My creativity shouldn't be limited by how much I make.  I think it was on Little Women where they said "Necessity is the mother of invention. " Amen and amen.  

I am so thankful that as a one-budget family, I've been challenged to think outside the box.  Such happy little projects come out of my determination to use what we already have on hand! 

These cans came from exactly that.  I knew I wanted a holiday centerpiece that was colorful and unique....and me.  So, I started collecting cans from vegetables, beans, or whatever we happened to be eating (chili season is a PERFECT time to save your cans!).  I then gathered some paint, paper supplies, and fabric/thread that all kind of went with the same color scheme (basically, a lot of color)  

The first step I completed with most of the cans was paint them.  I used regular acrylic craft paint and made stripes, dots, and big sections of paint.  

The last step to make the cans was to hot glue all the fun embellishments on!  
I adore how these turned out. 
I'll show you the finished table centerpiece with them soon! 
Just wait 'till you see what I put inside, I think you're going to like it. :) 

Happy can-crafting. 
Sara 


Wednesday, October 2, 2013

Jack O' Lantern Pasta Salad Stuffed Peppers


Becca here with a fun, no-dye, no-sugar way to incorporate the upcoming fall and harvest season into your family's meal time!  I saw this idea somewhere long ago and had it saved in my mind, so I'm not sure who to give the credit to.  However, I do remember that their recipe was for cooked stuffed peppers, something I knew my children wouldn't appreciate.  They are all in agreement that cooking bell peppers "ruins them" (yes, their words, not mine).  So, I stuffed the sweet, crisp, raw peppers cut with a traditional jack o' lantern face with a simple salmon salad inside.  If you don't like salmon, you could easily substitute tuna, chicken, or just leave it out entirely.  Some of the kids picked the pepper up and ate it together with the salad, while others scooped the salad out first and then ate the salad.  Either way works!  My kids loved this seasonal treat, I hope yours do too! 

1 orange bell pepper per person
4 cups cooked pasta
1/2 cup mayonnaise
1 can (14.5 ounce) salmon, drained, bones & skin removed (OR a 7 ounce boneless, skinless can)
1 cup frozen peas
1 can (6 ounces) black olives, drained
1 cup halved cherry or grape tomatoes
salt & pepper to taste

In a large bowl, gently stir to combine all salad ingredients (cooked pasta, mayonnaise, salmon, peas, black olives, tomatoes, salt, and pepper).

Use a small paring knife to cut the very top off of each bell pepper, keeping the stem intact. 

Cut off and remove the membranes and seeds inside and attached to the top piece. 

Using the small paring knife still, carefully cut a "Jack O' Lantern face" into each bell pepper.

Use a table spoon to stuff pasta salad into each pepper, replace top, and serve immediately.

Thursday, January 31, 2013

Valentine's Day Ideas

Becca here with a quick interruption in the 'freezer friendly' series I'm going to be continuing the next few weeks on Tuesdays & Thursdays.  With Valentine's Day being two weeks from today, I thought I'd share a few of my favorite ideas.  All of them are quick & easy, but have great end results!  Enjoy!

Celery Stamped 'Rose' Valentines

DIY Personalized Foaming Soap Bottles (FYI, a full year later, our still look great & have been refilled many times!!)

Dark Hot Chocolate Mix

Here are several more creative gift & packaging ideas. 

And, there's always the DIY Valentine's Basket option that we're doing this year.  I spent about 3 minutes punching hearts out of "Valentinesy" paper, and added them to a basket with glue sticks, blank cards & envelopes (half price from the $1 spot at Target last year!), and some stickers that coordinated.  The older kids sat at the table while I finished dinner & made a few each, using the markers, colored pencils, etc. that are always available.  I put the basket away for the night, and will pull it out again over the next week or so when they need something constructive to do to keep busy (and out of trouble)!


Wednesday, January 9, 2013

Mitford Spiced Apple Cider


Jana here with a wonderful warm, winter recipe!  My mother-in-law passed this recipe to me, and she got it from her Jan Karon Mitford Cookbook.  This is a cider that is very easy to make, but tastes like you spent a lot of time on it!  Kids and adults alike will love it, and it is a great addition to any winter gathering!  You can make it in your slow cooker, and leave it there to stay warm.  This makes it easy for guests to be served a warm cup of cider at any point!

Mitford Spiced Apple Cider

2 teaspoons whole cloves
2 teaspoons whole allspice
6 cinnamon sticks
1 gallon apple cider
1 cup brown sugar
1/2 teaspoon salt
1/4 teaspoon ground nutmeg

1. Tie cloves, allspice, and cinnamon sticks in a cheesecloth bag.

2. Pour cider into a large slow cooker, and add brown sugar, salt, nutmeg, and spice bag.

3. Heat on high for one hour, and then turn to warm. 

Enjoy!

Tuesday, December 18, 2012

100% Whole Wheat Super Tasty Vanilla Butter Sugar Cookies & Very Vanilla Frosting


Becca here with one of my absolute favorite recipes.  My first note on the recipe is from 2005, so I've been making it for several years at least, and have no idea where I got the recipe.  These are the perfect sugar cookies in my opinion; sweet with lots of vanilla and a nice buttery texture, plus they roll out and hold their shape very well, so they're perfect for cookie cutters and children helping!  This year I experimented with making them with 100% whole grains.  I usually grind my own wheat to make flour, but since not everyone does that, I also experimented with "King Arthur's organic white whole-wheat flour" that is pretty readily available, both in local stores and online.  I was more than pleased with the final results of the modified recipe, and am happy to share it with you!  These cookies have such a great flavor, I love them unfrosted as well as with the frosting recipe that follows.  They do freeze well too, if you want to make the cookies ahead of time and have a decorating party later :)  A couple of tips: 1) Use real vanilla extract.  Not imitation or artificially flavored, the real deal.  If you make your own it's less expensive anyway, and the taste is noticeably better! 2) Be sure and use real butter, they will not turn out the same with margarine.  If you haven't researched the health effects of chemical laden margarine versus real butter anyway, I'd encourage you to do that.  3) Don't skip the refrigerating the dough step; make it the night before it you need to so you'll remember and not be rushed, but it's essential to being able to handle the dough, as well as them baking properly.  4) Instead of the whole wheat flour, I prefer to use a light dusting of cornstarch on my rolling surface (I use a large edgeless baking sheet) and rolling pin.  I think it is more effective with a smaller amount, and doesn't dry out the surface of the cookie like using lots of flour, especially whole wheat, can.  Enjoy!

100% Whole Wheat Super Tasty Vanilla Sugar Cookies

1 1/2 cups sugar (I used organic)
1 1/2 cups real butter, softened (not margarine!)
2 large eggs
2 Tablespoons real vanilla extract (I make my own for a better flavor & to save money!)
4 cups whole wheat flour (I used King Arthur's organic white whole-wheat flour)
1 teaspoon salt
1 teaspoon baking soda
1 teaspoon cream of tartar

In a large mixing bowl, beat sugar & butter until creamy.  Add eggs and vanilla, beat well until combined.
Mix dry ingredients (flour, salt, baking soda, cream of tartar), and gradually add to creamed butter mixture until completely blended.
Chill, covered, in the refrigerator at least an hour, or overnight.
Preheat oven to 350.
On a lightly floured surface (see note above, I prefer cornstarch), roll dough to 1/4" thickness.  This is fairly thick, but I never do mine any thinner than this, I think they are easier to handle and bake better with a thicker dough.  Use cookie cutters to make your shapes, placing them onto a baking pan after cut out. 
Bake at 350 for 10-15 minutes, depending on cookie cutter size and thickness of dough.  The edges should have just started to slightly brown, and the cookie should not appear wet & doughy in the middle. 
Remove cookies from cookie sheets and let cool on wire racks. 
After they're completely cool, cookies may be eaten as is (they're really tasty just like this!), frozen until ready to use, or decorated.  See recipe below for my favorite frosting.

Vanilla Butter Frosting

1 1/2 cups confectioner's sugar (aka powdered sugar)
3 Tablespoons butter, softened
1 Tablespoon vanilla extract
1 Tablespoon milk

Beat sugar, butter, vanilla, and milk until creamy.  Add a few extra drops of vanilla and/or milk to reach desired consistency.

Thursday, December 13, 2012

Creative Gifts & Packaging!


Becca here with some great last minute gift & packaging ideas that are perfect for teachers, neighbors, postal & UPS workers, and anyone else you would like to give a little something to.

For my childrens' AWANA & Sunday School teachers, we used this great DIY kit (no affiliation, we've just used their products several times & love them!) to make all natural lip balms, something I thought everyone can always use another of, especially in the dry cold months.  For the packaging, since I wanted it to be entirely self-contained so they could hand it out themselves, and also ble to fit into their bags they take to church with them, we cut the flat middle section out of a brown paper bag ($6 for 500 at Sam's Club, the same kind we use for Perfect Popcorn) and the kids each wrote "Thank You" on it.  Then we inserted a lip balm, and quickly stitched around the edges using a 4.0 size stitch on my sewing machine, with festive red thread.  To make it really simple for them to hand out, I even stitched our Christmas Card diagonally across the corner to attach it, so it's really all-in-one.

We made 12 of these, and total time for everything, including making labels for the lip balm, trimming the bags, the kids writing on them, stuffing them, and sewing them up was about thirty minutes.  An hour counting making the lip balm.

We also used the same packaging for itunes giftcards for teenage family members at our extended family gift exchange where we draw names (and celebrate early, we've already had it this year), and they thought the gift card sewed up inside was pretty cool. 

Add one of these Homemade 'Cookie Cutter' Perler Bead Ornaments or Gift Tags for an extra cheery gift package!

You could use the same idea for a variety of yummy food gifts too, placing them into a zip top bag first, and then enclosing the whole thing in the brown paper bag packaging, including some of my favorites such as:

Roasted Sugared Almonds

Dark Hot Chocolate Mix

DIY Mocha Mix

Sweet Homemade Cornbread (I premix the dry ingredients in batches for myself to save time when I make it, including that and a copy of the recipe would make a great gift I know I'd appreciate!)

Using a slightly larger bag, you could still stitch the edges up and fill it with these yummy baked goods:

Gluten Free Banana Bread

Lime Meltaway Cookies

Amazing Gluten Free Blueberry Muffins

Granola - Dairy Free, Gluten Free, Grain Free (and Yummy!!)

Whole Grain Pumpkin Muffins

And, for a few other fun gift suggestions:

Homemade Vanilla Extract

Recycled Christmas Card Puzzles for Kids

Your Kids 'in' a Bottle of Soap (one of my favorites!!)

Super Easy DIY Perler Bead Dishes

Hanging Dish Towel Tutorial


Thursday, December 6, 2012

DIY 'Recycled' Christmas Card Puzzles


Becca here with craft for your kids to do this Christmas Season that could not be any easier, or less expensive (aka free!).  The only required materials to make these fun puzzles are the front cover of used Christmas Cards you've received in the mail, and some sort of large craft (often used in scrapbooking) paper punch.  I actually borrowed a star type shape from a friend to make these, but a large circle or square would work just as well.  Since my children are a bit older, I place 8-10 card front with several pieces punched out each, and their cooresponding punched out pieces into a quart sized zip top bag, leaving them to sort out which pieces goes with which card, and then to rotate it around to make a correct match.  It's actually more a bit more difficult than you would think this way, making it a good challenge even for a bit older than the preschool crowd.  Of course, to make it simpler for the younger ones, I just give them a card or two at a time.  Wouldn't it be fun to use photo cards to make really personalized puzzles also?  We've actually made these for several years now, and the kids still enjoy them. 

This is pretty self-explanatory, but just in case you need a few tips:

Cut along the fold in the Christmas Card to remove the decorative front cover.  The sturdier the paper used on the card, the more durable the puzzle will be. 

Use a large hole punch of any shape to cut several pieces out.  Store cooresponding card fronts and punched out pieces in a zip top bag.  For younger children I give them 1-2 puzzles at a time, whereas older children can handle the challenge of sorting 8-10 out at a time.  Enjoy!

Monday, December 3, 2012

Mini Pumpkin Pies

Isn't mini food just so much more fun? I sure think so.  I recently wanted to bake a pumpkin pie for my family but didn't want to make my own pie crust.  I decided to buy a frozen pie crust and as I was looking in the frozen food aisle I noticed these tiny pie crusts.  I decided to give them a try and was very pleased with the results!  If you wanted to make your own pie crust, you could get the same look by pressing your pie crust into individual aluminum tins. This pie is delicious and doesn't take too long to make!  One pie is actually quite filling.  I finished mine, but really could have shared.

Mini Pumpkin Pies
Ingredients:
15 oz. canned pumpkin (or homemade pumpkin puree)
2 TB butter, softened
3/4 cup brown sugar, unpacked
1/2 cup 2% milk
1 egg
2 egg whites
1/4 tsp. ground nutmeg
1/2 tsp. ground cinnamon
1 tsp. vanilla extract
1 frozen pie crust

Directions: 
Preheat oven to 350 degrees.  Place pumpkin in a mixing bowl.  Add softened butter and mix well on low to medium speed.  Next, add brown sugar, egg, egg whites, milk, cinnamon, nutmeg, and vanilla to the bowl and mix on medium speed until mixture is smooth.

Pour pie filling into pie crust and bake between 45-60 minutes, or until knife comes out clean.
*The bake time can vary so please watch the crust on your pie so it doesn't burn!  I poured my pie filling directly into the frozen shells and baked the pies for around 50 minutes. 

(Recipe adapted from: here)

Happy Eating!
Sara

Tuesday, November 13, 2012

Two Fall Thanksgiving Crafts for Kids! Fall Tree Tutorial & Thanksgiving Poem Bracelet Tutorial


Becca here with two fun Fall Thanksgiving themed crafts that would be great to do with your kids!  We had an extra child here the day we did these, so a 4 1/2 year old and two 7 year olds participated, and all of them enjoyed the activities, and did a great job on the finished product!  My favorite types of "arts and crafts" for the kids to do are ones that I can lead them in, but they can do entirely on their own, and put their own unique twist on it, so they don't all end up looking exactly the same.  I was inspired by this fall tree I saw on Pinterest and this Thanksgiving Poem, also found on Pinterest.  The kids really loved making the trees, complete with falling leaves and leaf piles, and creating their own design in the trunk with yarn, and I read the poem to them and had them add the beads to their bracelet as they heard me say the color in the poem, a great listening activity!  As a bonus, even really little ones can then use the bracelet to tell the main points of the story of the First Thanksgiving to others!  I think it would be a great, simple activity to bring to a Thanksgiving Meal for the children to do after they've finished eating, or while they're waiting on the big meal.  Enjoy!

Thanksgiving Poem Bracelet Tutorial

(all supplies are per person/bracelet)

1 pipe cleaner, any color (I used pink for the girls & blue for the boys because I had colored ones)
1 bead each:  white, blue, green, black, brown, red, yellow, orange
1 copy of the poem you can download a Word Document here


Read the poem out loud to the children, instructing them to place a bead onto their pipe cleaner when they hear its' color in the poem.  I read a second time, to have them 'check their work' and hear the poem a second time also. :)

Fall Tree Tutorial

(all supplies are per person/tree)

1 piece card stock (we used light blue)
"school glue" that dries clear (we used Elmer's that goes on sale really cheap during back to school)
several yards of brown yarn
20-30 small puzzle pieces (for a puzzle, pocket change at the thrift store, or $1 at the dollar store)
red, orange, yellow, and green paint *see note below about types of paint
a small strip of sponge (I cut a super cheap household sponge into 4 sections, see photos)

Have the child lightly sketch the outline of a tree trunk on their paper, then trace the line with glue and place a piece of yarn on top.  Then encourage them to use the yarn, either in one long strip or cut into pieces, I had children to do some of each, to cover their trunk in whatever "treeish" design they choose.  Be sure to press down lightly so the yarn sticks.


Meanwhile, prepare small plastic plates, clean empty yogurt containers, etc., with a bit of each color of paint.  It's okay if they're touching a bit, but try to keep them separate for the most part for now. 


Give each child a strip of sponge 'brush' and container of paint colors to decorate their puzzle piece "leaves" with.  Remind them that the leaves are all different colors this time of year, so dabbing the sponge 'brush' into the different colors will look nice.  The patting or 'dabbing' method works best, I also reminded the children that stirring or smearing would result in all of the colors mixing, and that would mean they would end up with all brown leaves.
 
  We used a cereal bag I wiped off and cut into one piece for each child as our backdrop for painting.  Wax paper would be a great alternative also, and paper would work okay, as long as you carefully removed the pieces when they're dry to avoid the paper sticking.
 
Let the pieces dry a few minutes, then glue them to your tree trunk.  I encouraged the kids to lay them out first, before gluing, to get an idea of how they wanted them to look.  Don't forget to have a few falling leaves, and some on the ground also!
 
Find somewhere to display your beautiful, creative & original, Fall Art!  I love how each one turned out a bit differently, based on each child's imagination!  Enjoy!
 

*We've had this Crayola set of paints for a long time, good sized bottles & it's very washable and inexpensive, easily under $5 for the set of 10 on sale or with a coupon, and they last a long time.  I also like the really cheap bottles of acrylic paint you can pick up at most craft & supercenter type stores and let the kids use them also, especially on canvas or for something more permanent we're going to hang on the walls & keep, although they aren't as washable.