Showing posts with label lunch. Show all posts
Tuesday, January 24, 2017
Pizzadillas
Becca here with a super quick and easy meal that is on our regular rotation. It's easy enough that even my youngest kids can help. Making Homemade Tortillas is my very favorite, but not something I can prioritize right now; these from Sam's Club are what we typically use in this stage of life. Feel free to be creative and add in your favorite toppings, like mushrooms, peppers, black olives, etc. Offering an array of different choices, and letting kids make their own, can be a great way to get them to try some new-to-them foods. I typically cook 2-3 pounds of sausage at a time. Our favorite is to mix JC Potter breakfast sausage with half homemade sausage made with deer meat. Then I have it already cooked and ready to throw together some super quick meals, like Sausage & Egg Breakfast Fried Rice, Baked Breakfast Cups, 'Anytime' Breakfast Burritos, Unstuffed Zucchini Squash Skillet, Tuscan Soup, Breakfast Casserole, Sausage, Bean, and Spinach Stew, Breakfast Pizza, etc.
Pizzadillas
Your favorite tortillas - I typically allow two per person
Pizza Sauce - we use the Walmart store brand, because it is in glass, has no added sugar, and is just over $1
Mozzarella Cheese, shredded
Cooked sausage, beef, or pepperoni
Other toppings as desired (black olives, mushrooms, etc.)
Preheat large skillet or electric griddle.
Place tortilla onto hot pan, and immediately cover with a thin layer of cheese, pizza sauce, meat, and other toppings, ending with a few sprinkles of cheese, before placing another tortilla on top. Make sure not to make the toppings too thick, or the pizzadilla will be soggy.
When the bottom of the pizzadilla has started to lightly brown (you can peek under it using a spatula!), carefully flip it over. Continue to cook until both sides are golden brown and beginning to crisp.
I let them rest on a dinner plate for a minute or two while I load the next batch of tortillas, and then use kitchen shears to slice them into quarters and serving. Enjoy!
Friday, June 13, 2014
Homemade Sandwich Bread (Bread Machine Recipe)
Jana here, and today I wanted to share my favorite homemade bread recipe! I make it for our family's sandwich bread each week. Well, since we have 5 people in our family, a loaf doesn't typically last a whole week...so I normally make this about every 4 or 5 days. That is about the length of time that the bread will stay fresh. If you know you won't be able to eat it in that time frame, I would slice the loaf and freeze it. Then, you'll be able to pull out enough for each day, etc. The bread maker that I have (and love) is the Panasonic SD-YD250. I have used it consistently for months, and always had great results. I highly recommend it! This recipe is modified from one of the recipes that came in a booklet with my machine. My mother-in-law has the same bread machine, and told me about some modifications she made to make this a great sandwich bread. I tried it, and we loved the results too!
Homemade Sandwich Bread
1 1/2 cups all purpose flour
1 1/2 cups whole wheat flour
1 tablespoon brown sugar
1 1/2 tablespoons powdered milk
1 1/2 teaspoons salt
1 1/2 tablespoons butter (I like to cut this into smaller pieces)
1 1/4 cups water
1 teaspoon yeast
For the bread machine listed above, this would require you to use the 'wheat' setting, and makes a 'medium' size loaf. I know all bread machines differ, but I think this recipe could be used in different machines!
Enjoy!
Wednesday, June 11, 2014
Beef Asian Lettuce Wraps
Becca here with a recipe my family really enjoyed. I modified a recipe from Rachael Ray's cooking magazine that my Grandma subscribes to and kindly passes on to me when she's finished with. I love a good lettuce wrap of any type, chicken, beef, seafood, meatless, etc. but they aren't something I've typically made at home often because the recipes usually call for either a long list of ingredients, lots of strange things, involved prep and cooking, or all of the above. So I was super excited to try this recipe that calls for just a handful of things that you should be able to pick up at any grocery store; I found them all easily at my Arkansas Walmart. Honestly, I was a bit skeptical about the end result, but what I thought I was making as a double batch for the freezer ended up being gone in one dinner meal, with just a few leftovers for my husband to take to work for his lunch the next day.
Beef Asian Lettuce Wraps
1/2 cup hoisin sauce (in a jar, with the other Asian products at my store)
2 Tablespoons soy sauce
2 pounds ground meat (I used beef, chicken or turkey would be good & probably more authentic :)
4 large carrots, shredded (I wash only, and don't peel first)
6 garlic cloves, minced
8 green onions, both whites and greens chopped
1 large head of lettuce, leaves separated and left whole (butter lettuce is great)
In a large skillet, begin browning ground meat and garlic, breaking it apart as it cooks. If you're using a super lean poultry, you may need to add a tablespoon or so of oil for best results. When the meat is starting to show signs of being done, add shredded carrots. Cook an additional few minutes, and then right before the meat is finished, add green onions. Drain, if necessary.
Reduce heat to medium when meat is cooked through, and stir in hoisin sauce and soy sauce. Stir well to combine, and cook an additional 2-3 minutes, or until heated through.
Serve with lettuce leaves to use for cups. I recommend serving the meat mixture and lettuce separately and letting people fill their lettuce right before eating it, so that the lettuce stays nice and crisp and doesn't wilt. Plus, my kids think it's great fun :) Enjoy!!
Wednesday, June 4, 2014
Pea Salad
Becca here with a recipe that both my husband, Samuel, and I grew up eating! I remember my mom making this as a side dish that my dad particularly enjoyed. Samuel's paternal grandmother also makes a very similar salad, and often served it as a main dish for a quick meal when we lived right down the street from them and I was home alone a lot because my husband was traveling for work. I am going to give a 'recipe' because I actually measured out what I used last time I made it, and I'm sure you can find a similar recipe written out somewhere, but I have never seen it in print; it's definitely a "little bit of this, little bit of that" type recipe that you can be creative with, depending on what is in your fridge, in season, or what your family's tastes prefer. I like to make a double batch, and serve it as a quick main dish once, and then use the leftovers as a side dish, or for my husband's lunch to take to work, depending on how much is left! I love that I can make it when I can find a few minutes of time during the day, and have dinner mostly finished when that time rolls around. Enjoy!
I also wanted to mention that in case you missed it, I used rafflecopter to select a winner of the Redmond Real Salt giveaway and it was announced via our Thrice the Spice Facebook Page, Emily Marsh was the winner.
Pea Salad
16 ounces frozen peas (Mimaw, Samuel's grandmother only uses Le Sueur canned peas, and that saves a step of cooking the peas, so use what you prefer! You will need two cans of peas.)
1/2 medium onion, finely chopped (I use purple onion normally)
1 cup cheese, in small cubes, or grated (I use sharp normally, and prefer cubed, but grated is quicker)
2-3 hardboiled eggs, finely chopped
2-3 slices of cooked bacon, crumbled (optional, but definitely delicious!)
2/3 cup mayonnaise (I use Vegenaise or olive oil mayo)
Salt & Pepper to taste (I use Real Salt, amount will depend on what kind of peas you used, if you used bacon, etc. :)
If using frozen peas, cook according to package instructions. Drain cooking water off, and rinse peas in cool water.
In a large bowl, combine all other ingredients (cooked peas, onion, cheese, boiled eggs, bacon, mayonnaise). Gently stir to combine. Taste, and add salt and pepper as necessary.
Serve immediately, or, for best taste, let chill in the refrigerator, covered, a few hours or overnight to let flavors mingle.
Friday, May 23, 2014
Crustless Spinach Quiche + Redmond "Real Salt" Giveaway!
Becca here with one of my 'staple' recipes to share today! After my apologies for the 'technical difficulties' on the blog this week, that were, technically, all because of my human error. A migraine that had me out for a full 24 hours, combined with a day trip out of state to a theme park with my family plus several other family friends, theater costume measurements, horseback riding lessons, nursing home visits, Bible Studies, and regular homeschooling, chicken, garden, and household managing of a 6-person household meant that the blog fell through the cracks this week, so I'm sorry!
I DO have one of my "go do" recipes to share on the blog today, AND a giveaway for products my house is never without! In fact, I searched twice to double check that I hadn't shared this recipe already, I couldn't believe I hadn't already posted it! This crustless spinach quiche is a great recipe that I've served at any meal, for any occasion. I've served it to a large crowd at birthday parties, taken it to friends that needed a meal, and fixed it at home when I needed to go to the store and we just needed a quick and filling dinner with what was left in the fridge. My notes on the original from allrecipes date back to April 2007, so I've been making for at least 6 years.
Feel free to substitute with a similar veggie or cheese; in fact, this time, in the quiche pictured here, I used Pokeweed instead of spinach! I had precooked it, after two friends' mothers, separately, helped the kids and I identify it, and I had thorough cooking instructions from one of them, plus read a lot online, and then followed the normal recipe from there. A tip on all quiches, is to let them sit for about ten minutes after you remove them from the oven, to allow the eggs to set, so then you can cleanly and neatly slice it! My kids all 4 love this quiche, I hope you'll give it a try! Recipe follows giveaway info!
If you've been reading this blog for any amount of time, you've probably noticed that I usually, in the ingredients list, mention that I use "Real Salt" for our household salt. So when I was placing an order recently, and for Earthpaste also, which my daughter had been begging for again, since we'd been out for a few weeks with the recent move we had, I contacted Redmond and asked if they would be willing to do a giveaway, and they said yes! So I'm super excited to be giving away the price package above!
In a one line explanation, I like to tell people that Redmond Real Salt is like using whole grains instead of white flour. And it tastes SO much better I think; like to the point where white table salt at a restaurant or something has a funny after taste to me now even! They have a super informative website here with a great video and online brochure explaining the health benefits of a real salt. As they say,
"Real Salt comes from an ancient sea bed in Central Utah, where for more than 30 years we've delivered completely natural sea salt -- nothing added, nothing taken away. That means you get more than 60 trace minerals in a delicious, healthy salt that is never chemically treated, bleached, or kiln dried."
So the winner will receive a 10 ounce container of Real Salt, as well as 4.75 ounce each containers of Organic Garlic Salt and Organic Onion Salt, both made with Real Salt! They also have a seasoning salt, and a 26 ounce 'refill bag' size of Real Salt that I usually purchase (at amazon, vitacost, directly from Redmonds, or at my local health food store, depending on what is more convenient for me at the time!)
Redmonds also has a line of "Redmond Clay" products that I also use regularly and love. The winner will receive a 10 ounce jar of the powdered clay also! Their Earthpaste toothpaste is made with the Redmond Clay, xylitol, Real Salt, menthol, and essential oils, and is the only toothpaste 3/4 of my kids even like! It doesn't have any foaming agents, and is safe to swallow also. We've tried all of the flavors, and they like them all, although spearmint is their very favorite. I like the convenience of the clay already hydrated in a tube for a first aid cream, and it really does seem to draw the toxins out of burns, bites, and stings, which we've had plenty of since moving to the 'farm' especially!
"Redmond Clay is a completely natural bentonite clay, extracted from the earth and brought to you in its pure, natural state. Redmond Clay is available as a fine powder, pre-hydrated gel, or in easy-to-swallow capsules. Redmond Clay™ remains as pure today as it was when the Fremont indians discovered its uses long ago. As our world returns to more natural lifestyles, more and more people keep Redmond Clay in their medicine cabinets, first aid kits, and purses. Discover for yourself the healing benefits of Redmond Clay."
I've included lots of links above, and their websites are full of informative videos, graphs, and articles I'd encourage you to check out if you're interested; they really are products we use everyday at our house, and I'm excited for one of you to get to try them! To enter, just use the rafflecopter below! Notice one of the entries you can do once per day! Contest ends 5/30/14.
a Rafflecopter giveaway
If you've been reading this blog for any amount of time, you've probably noticed that I usually, in the ingredients list, mention that I use "Real Salt" for our household salt. So when I was placing an order recently, and for Earthpaste also, which my daughter had been begging for again, since we'd been out for a few weeks with the recent move we had, I contacted Redmond and asked if they would be willing to do a giveaway, and they said yes! So I'm super excited to be giving away the price package above!
In a one line explanation, I like to tell people that Redmond Real Salt is like using whole grains instead of white flour. And it tastes SO much better I think; like to the point where white table salt at a restaurant or something has a funny after taste to me now even! They have a super informative website here with a great video and online brochure explaining the health benefits of a real salt. As they say,
"Real Salt comes from an ancient sea bed in Central Utah, where for more than 30 years we've delivered completely natural sea salt -- nothing added, nothing taken away. That means you get more than 60 trace minerals in a delicious, healthy salt that is never chemically treated, bleached, or kiln dried."
So the winner will receive a 10 ounce container of Real Salt, as well as 4.75 ounce each containers of Organic Garlic Salt and Organic Onion Salt, both made with Real Salt! They also have a seasoning salt, and a 26 ounce 'refill bag' size of Real Salt that I usually purchase (at amazon, vitacost, directly from Redmonds, or at my local health food store, depending on what is more convenient for me at the time!)
Redmonds also has a line of "Redmond Clay" products that I also use regularly and love. The winner will receive a 10 ounce jar of the powdered clay also! Their Earthpaste toothpaste is made with the Redmond Clay, xylitol, Real Salt, menthol, and essential oils, and is the only toothpaste 3/4 of my kids even like! It doesn't have any foaming agents, and is safe to swallow also. We've tried all of the flavors, and they like them all, although spearmint is their very favorite. I like the convenience of the clay already hydrated in a tube for a first aid cream, and it really does seem to draw the toxins out of burns, bites, and stings, which we've had plenty of since moving to the 'farm' especially!
"Redmond Clay is a completely natural bentonite clay, extracted from the earth and brought to you in its pure, natural state. Redmond Clay is available as a fine powder, pre-hydrated gel, or in easy-to-swallow capsules. Redmond Clay™ remains as pure today as it was when the Fremont indians discovered its uses long ago. As our world returns to more natural lifestyles, more and more people keep Redmond Clay in their medicine cabinets, first aid kits, and purses. Discover for yourself the healing benefits of Redmond Clay."
I've included lots of links above, and their websites are full of informative videos, graphs, and articles I'd encourage you to check out if you're interested; they really are products we use everyday at our house, and I'm excited for one of you to get to try them! To enter, just use the rafflecopter below! Notice one of the entries you can do once per day! Contest ends 5/30/14.
a Rafflecopter giveaway
Crustless Spinach Quiche
5 eggs
1 Tablespoon butter (or oil)
1 small onion, finely chopped
1 (10 ounces) package frozen chopped spinach, cooked and drained well
1-2 cups shredded cheese (I like sharp cheddar, amount is your preference!)
1/2 teaspoon salt (I use Real Salt)
1/2 teaspoon pepper
Preheat oven to 350.
In a medium skillet over medium high heat, heat butter (or oil) and onion for a few minutes, stirring occasionally, until onion is translucent.
Add (cooked and well drained) spinach, and stir continuously and cook an additional couple of minutes until the water has all evaporated out of the spinach. Remove from heat.
In a large bowl, beat eggs until well blended. Stir in salt, pepper, cheese, and spinach mixture.
Pour into a lightly greased 9" pie plate, an cook at 350 for about 30 minutes, or until center has set.
For best results in slicing, let quiche sit for about 10 minutes after removing it from the oven. Enjoy!
Friday, November 1, 2013
'Any Season' Roasted Vegetable Spinach Salad
Becca here with a delicious salad that really is 'all season'. I love a good summer salad with tomatoes & cucumbers, or any type of berries, but we try to eat as seasonably as possible, both for taste and cost reasons, making a lot of the traditional salad ingredients not feasible during the fall and winter months. However, here, a recipe I based off of one in this cookbook, a variety of vegetables are roasted in a yummy balsamic vinaigrette, which is also used as the dressing. I love any vegetables roasted, and the vinaigrette gives it an extra special touch. In this photo I used bell pepper, squash, red onion, and carrots, but really any of your favorite veggies could be used, whatever is in season in your area or you have in the fridge waiting to be used up! My husband is not a huge salad lover, especially a salad as a meal, but does like it when I send this packed in his lunch to eat at work. I just put the dressing and vegetables in one container, the spinach in another, and it's super quick & easy for him to mix them together right before eating, so the salad tastes nice and fresh, no wilting! I think this would make a great meal to serve to guests, it's easy to prep ahead of time and just roast at the last minute, and makes a beautiful presentation! Let me know what combination of vegetables you use!
'Any Season' Roasted Vegetable Spinach Salad
4 Tablespoons balsamic vinegar
2 Tablespoons Dijon mustard
2 cloves garlic, minced
1/2 cup olive oil
salt and pepper, to taste
6 - 8 cups mixed vegetables, cut into bite sized pieces (in this recipe I used 1 cup sliced carrots, 1 red onion, 1 red bell pepper, 1 yellow bell pepper, and 1 really large yellow squash)
6-8 ounces baby spinach leaves
Preheat oven to 450.
Combine dressing ingredients (balsamic vinegar, Dijon mustard, garlic, and olive oil) in a pint mason jar (or any container with a tight fitting lid about that size) and shake well until combined.
Place cut vegetables onto a rimmed baking sheet and drizzle with about 2/3 of the vinaigrette, being sure to leave some to use to dress the salad.
Bake at 450 about 20 minutes, stirring halfway through, or until vegetables are roasted.
Let cool slightly, about 15 minutes. Top spinach with roasted vegetables and remaining vinaigrette to serve. Enjoy!
Wednesday, September 25, 2013
Homemade Chicken Nuggets {Dairy Free, Gluten Free}
Becca here with a recipe that I'm super excited to share! I've tried several homemade chicken nugget recipes over the years, with mixed success, but nothing that I liked well enough to make again, and definitely nothing I liked well enough to share here. However, after changing this recipe quite a bit, I finally have one that my family all loves, and is really easy to make also, which I appreciate, of course! A bonus for those of you that have food restrictions is that it is both gluten and dairy free also! One recipe makes three half-sheet sized pans (like pictured above) of large nuggets, so I've included freezing and reheating instructions at the end also. I hope you'll give this recipe a try, it's a definite winner in my family!
Homemade Chicken Nuggets
{Dairy Free, Gluten Free}
8 cups of really tender cooked chicken, a mix of dark and white meat (I buy the hormone/antibiotic free 2 pack of chickens at Sam's Club and cook both of them together in my large slow cooker overnight on low, let it cool, and then remove the meat that is literally falling off of the bone. See this post for more information on that and how to make chicken stock from the leftovers too!)
5 large eggs
1/2 - 1 cup mayonnaise (depending on what kind of chicken you've used, see recipe for further instructions)
1 Tablespoon salt
8 cups plain puffed rice cereal (this is unsweetened, just plain puffed brown rice, nothing else added. A big bag is $1 at Walmart on the cereal aisle, with the more natural/organic cereals. It makes a great first finger food for babies too, my original intent for buying it!)
Preheat oven to 400.
In a large bowl, combine chicken, eggs, mayonnaise (start with 1/2 cup) and salt. Use a large fork (or pulse in a food processor if you have one) to shred chicken and stir to combine all ingredients. Add more mayonnaise, up to 1/2 more, until mixture will easily stick together and form patties.
Place puffed rice in large zip top bag, and hit with a rolling pin until at least half are crushed (a great job for a child, my boys love doing this part!)
Form small nuggets or patties in desired size. Dip into partially crushed puffed rice, flipping over to coat both sides, gently patting so that it sticks.
Place onto silicone mat or parchment paper lined baking sheet. When full, bake at 400 for 8-10 minutes, flip all nuggets over, and bake an additional 8-10 minutes. If you're serving immediately, the edges and rice on the outside should be a dark golden brown and crisp. If you're going to be freezing them for later, remove them from the oven when they're just starting to get a slight golden color so they aren't dry when you reheat them later.
Serve plain, or with your favorite nugget dipping sauce! Enjoy!
Freezing Instructions: Place cooled-to-room temperature nuggets into airtight container or zip top bag, and freeze. To reheat, defrost in refrigerator overnight. Set out about 30 minutes before ready to bake. Reheat in 400 preheated oven for 5 minutes, or until heated through and crisp on the outside. I don't recommend reheating in the microwave, as the outside doesn't keep its' crispness that way.
Wednesday, June 12, 2013
Cashew Chicken Mango Salad
Becca here with a really delicious salad that's perfect for these warm months! I was inspired by this recipe, and found it super family friendly too, with tasty toppings like mango, cashews, chicken, and avocado. If your kids are really resistant to the idea of a salad for dinner, you could easily serve the toppings separately in a muffin tin for a fun, healthy meal without preparing something different for them. I make the dressing when I'm in the kitchen already earlier in the day, and use chicken from the freezer I've already cooked and frozen mango, so the salad comes together really quickly. I use this method to quickly get nice looking chunks of avocado out of the peel with just a paring or even butter knife. I think you'll enjoy this salad, it tastes like one from a nice restaurant for a fraction of the cost!
Cashew Chicken Mango Salad
*amounts are approximate, and to taste & your family's preference!
10 cups your favorite lettuce (we get the organic spring mix from Sam's Club every time we go)
2 cups cooked chicken, cut into bite sized pieces
3 cups diced mango (I usually use the frozen mango, mostly defrosted)
2 avocados, cut into bite size pieces
2/3 cup roasted cashews
Dressing:
1/2 cup lime juice
6 Tablespoons honey
4 Tablespoons olive oil
1/2 teaspoon salt
1/2 teaspoon pepper
Combine dressing ingredients into tightly lidded container (I use a pint canning jar) and shake well to combine thoroughly.
On each serving plate or bowl, place a generous layer of lettuce, and top with chicken, mango, avocados, and cashews. Top with dressing.
Refrigerate any leftover dressing to use later!
Wednesday, June 5, 2013
Homemade Sweet & Sour Sloppy Joes
Becca here with a recipe that my family really loved! Plus, the recipe as written makes enough for two meals (you could easily double it for extra efficiency!) and is really simple to freeze and reheat for a quick meal. I served it on Homemade Whole Wheat Hamburger Buns and they were super delicious. My inspiration recipe was from Real Simple Magazine, although I have made it a bit 'cleaner' with a few changes. This isn't your typical school cafeteria sloppy joe, the flavor is amazing, the perfect blend of sweet & tangy. I like mine served with a bit of yellow mustard on the bun, while the rest of my family preferred it just as is. Even my two children that were skeptical of any recipe with "sloppy" in the title ate their whole sandwich. Enjoy!
Homemade Sweet & Sour Sloppy Joes
1 Tablespoon olive oil
1 bunch green onions
2 pounds lean ground beef (or your favorite ground meat!)
1/2 cup soy sauce
1/2 cup tomato paste
1 cup water
1/3 cup sugar (I used organic demarara)
1 Tablespoon dried ginger
1 teaspoon salt
1/2 teaspoon black pepper
8-10 buns, for serving
In a large skillet, heat olive oil. Add chopped green onions (both green and white parts) and cook, stirring occasionally, for a couple of minutes, until softening. Add ground beef and cook, chopping up occasionally, until browned & cooked thoroughly. Drain if necessary, and then stir in remaining ingredients (soy sauce, tomato paste, water, sugar, dried ginger, salt, and pepper). Stir well and let simmer until desired consistency is reached, about 2-3 minutes.
Wednesday, May 8, 2013
Whole Rotisserie Style BBQ Chicken in the Slow Cooker (plus homemade chicken broth!)
Becca here with a super easy recipe for making a rotisserie style chicken in your slow cooker. I didn't get a good photo of the chicken before we ate it, but chickens are a bit hard to make attractive looking anyway I think, even if they taste amazing, and I hope you'll try this recipe anyway!!
I love the chickens that you can buy pre-cooked at most grocery stores and warehouse clubs now, but after actually reading the ingredient list on what all the chicken 'marinade' contains, including partially hydrogenated oils, tons of sodium, and several different preservatives, I didn't feel so great about purchasing them anymore. Whole chickens where I live are rather inexpensive, with their everyday price being just under $1/pound for 'regular' chickens, and just under $1.50/pound for antibiotic free/cage free chickens, my preference. Don't let the long list of spices in this barbeque style dry rub scare you, it's likely all things that you already have in your spice cabinet, and leaving one or two out or substituting something similiar will still result in a delicious chicken! I was inspired by the recipe here. With things like this that have several dry ingredients (like my favorite cornbread), I like to prepare several 'mixes' at a time in either reuseable containers or plastic zip top bags, so that when I'm ready to make it again half of the work is already done, and it really takes barely any extra time to measure out the extra meals once you already have everything out. I actually started my chicken late Saturday night and let it cook on low all night so that it would be ready and waiting for lunch after church on Sunday. You can't beat the convenience of that! Don't forget to make a big pot of super yummy homemade chicken stock with the bones & skin too! You just return those things to the slow cooker after you've removed the 'good' chicken, making this an extra economical recipe. My method for doing that is here.
Whole Rotisserie Style BBQ Chicken in the Slow Cooker
1 whole chicken, 4-5 pounds, giblets removed if they're included
1 large onion
2 Tablespoons paprika
2 Tablespoons salt (I use Real Salt)
1 Tablespoon onion powder
1 Tablespoon mustard powder
1 Tablespoon dried granulated garlic (minced garlic could also be used)
1 Tablespoon chili powder
1 Tablespoon lemon pepper
1 teaspoon dried basil
1 teaspoon ground red pepper
In a small bowl, combine all spices (everything except for the onion & chicken) and stir well to combine.
Slice the onion horizontally into 4-6 thick slices, keeping the rings together. You want to line the bottom of your slow cooker with these, so slice accordingly.
Line the bottom of your slow cooker with the onion slices. You're making a platform of sorts for the chicken to sit on.
Add the whole chicken, breast side up. Be sure to remove the giblets first! The antibiotic/cage free chickens I get at our local store have these in a plastic bag inside of the chicken that's super easy to pull out. The same type of chicken at Sam's Club is slightly less expensive for me, plus doesn't include the giblets that you're paying for and don't use when cooking a whole chicken, so I get those when possible.
Rub your spice mixture over the top and sides of the chicken. You want as much of it to stay on the chicken as possible, so just put pour any extra in right on top of, or even inside, the chicken.
Cover the slow cooker, and cook approximately 8 hours on low. My chicken the last time I made this recipe was five pounds, and I cooked it on low for 12 hours and it was great. Since you're cooking it with the skin on, and on the onion platform, you can get away with cooking it for a bit longer without it drying out. I actually like it to be so tender that it pretty much falls apart when you remove it from the slow cooker, since it makes removing the meat from the bone significantly easier.
Be sure and leave the onions in the slow cooker, as well as returning all of the non-edible parts of the chicken (bones, skin, etc.) to the slow cooker to make a great homemade chicken stock! The extra seasonings will make it really tasty, and a great base for soups! I love to cook quinoa in the homemade chicken broth too, it makes it extra tasty. You can see all the details here.
I love the chickens that you can buy pre-cooked at most grocery stores and warehouse clubs now, but after actually reading the ingredient list on what all the chicken 'marinade' contains, including partially hydrogenated oils, tons of sodium, and several different preservatives, I didn't feel so great about purchasing them anymore. Whole chickens where I live are rather inexpensive, with their everyday price being just under $1/pound for 'regular' chickens, and just under $1.50/pound for antibiotic free/cage free chickens, my preference. Don't let the long list of spices in this barbeque style dry rub scare you, it's likely all things that you already have in your spice cabinet, and leaving one or two out or substituting something similiar will still result in a delicious chicken! I was inspired by the recipe here. With things like this that have several dry ingredients (like my favorite cornbread), I like to prepare several 'mixes' at a time in either reuseable containers or plastic zip top bags, so that when I'm ready to make it again half of the work is already done, and it really takes barely any extra time to measure out the extra meals once you already have everything out. I actually started my chicken late Saturday night and let it cook on low all night so that it would be ready and waiting for lunch after church on Sunday. You can't beat the convenience of that! Don't forget to make a big pot of super yummy homemade chicken stock with the bones & skin too! You just return those things to the slow cooker after you've removed the 'good' chicken, making this an extra economical recipe. My method for doing that is here.
Whole Rotisserie Style BBQ Chicken in the Slow Cooker
1 whole chicken, 4-5 pounds, giblets removed if they're included
1 large onion
2 Tablespoons paprika
2 Tablespoons salt (I use Real Salt)
1 Tablespoon onion powder
1 Tablespoon mustard powder
1 Tablespoon dried granulated garlic (minced garlic could also be used)
1 Tablespoon chili powder
1 Tablespoon lemon pepper
1 teaspoon dried basil
1 teaspoon ground red pepper
In a small bowl, combine all spices (everything except for the onion & chicken) and stir well to combine.
Slice the onion horizontally into 4-6 thick slices, keeping the rings together. You want to line the bottom of your slow cooker with these, so slice accordingly.
Line the bottom of your slow cooker with the onion slices. You're making a platform of sorts for the chicken to sit on.
Add the whole chicken, breast side up. Be sure to remove the giblets first! The antibiotic/cage free chickens I get at our local store have these in a plastic bag inside of the chicken that's super easy to pull out. The same type of chicken at Sam's Club is slightly less expensive for me, plus doesn't include the giblets that you're paying for and don't use when cooking a whole chicken, so I get those when possible.
Rub your spice mixture over the top and sides of the chicken. You want as much of it to stay on the chicken as possible, so just put pour any extra in right on top of, or even inside, the chicken.
Cover the slow cooker, and cook approximately 8 hours on low. My chicken the last time I made this recipe was five pounds, and I cooked it on low for 12 hours and it was great. Since you're cooking it with the skin on, and on the onion platform, you can get away with cooking it for a bit longer without it drying out. I actually like it to be so tender that it pretty much falls apart when you remove it from the slow cooker, since it makes removing the meat from the bone significantly easier.
Be sure and leave the onions in the slow cooker, as well as returning all of the non-edible parts of the chicken (bones, skin, etc.) to the slow cooker to make a great homemade chicken stock! The extra seasonings will make it really tasty, and a great base for soups! I love to cook quinoa in the homemade chicken broth too, it makes it extra tasty. You can see all the details here.
Wednesday, April 17, 2013
100% Whole Wheat Hamburger Buns {freezer friendly - makes 15 buns}
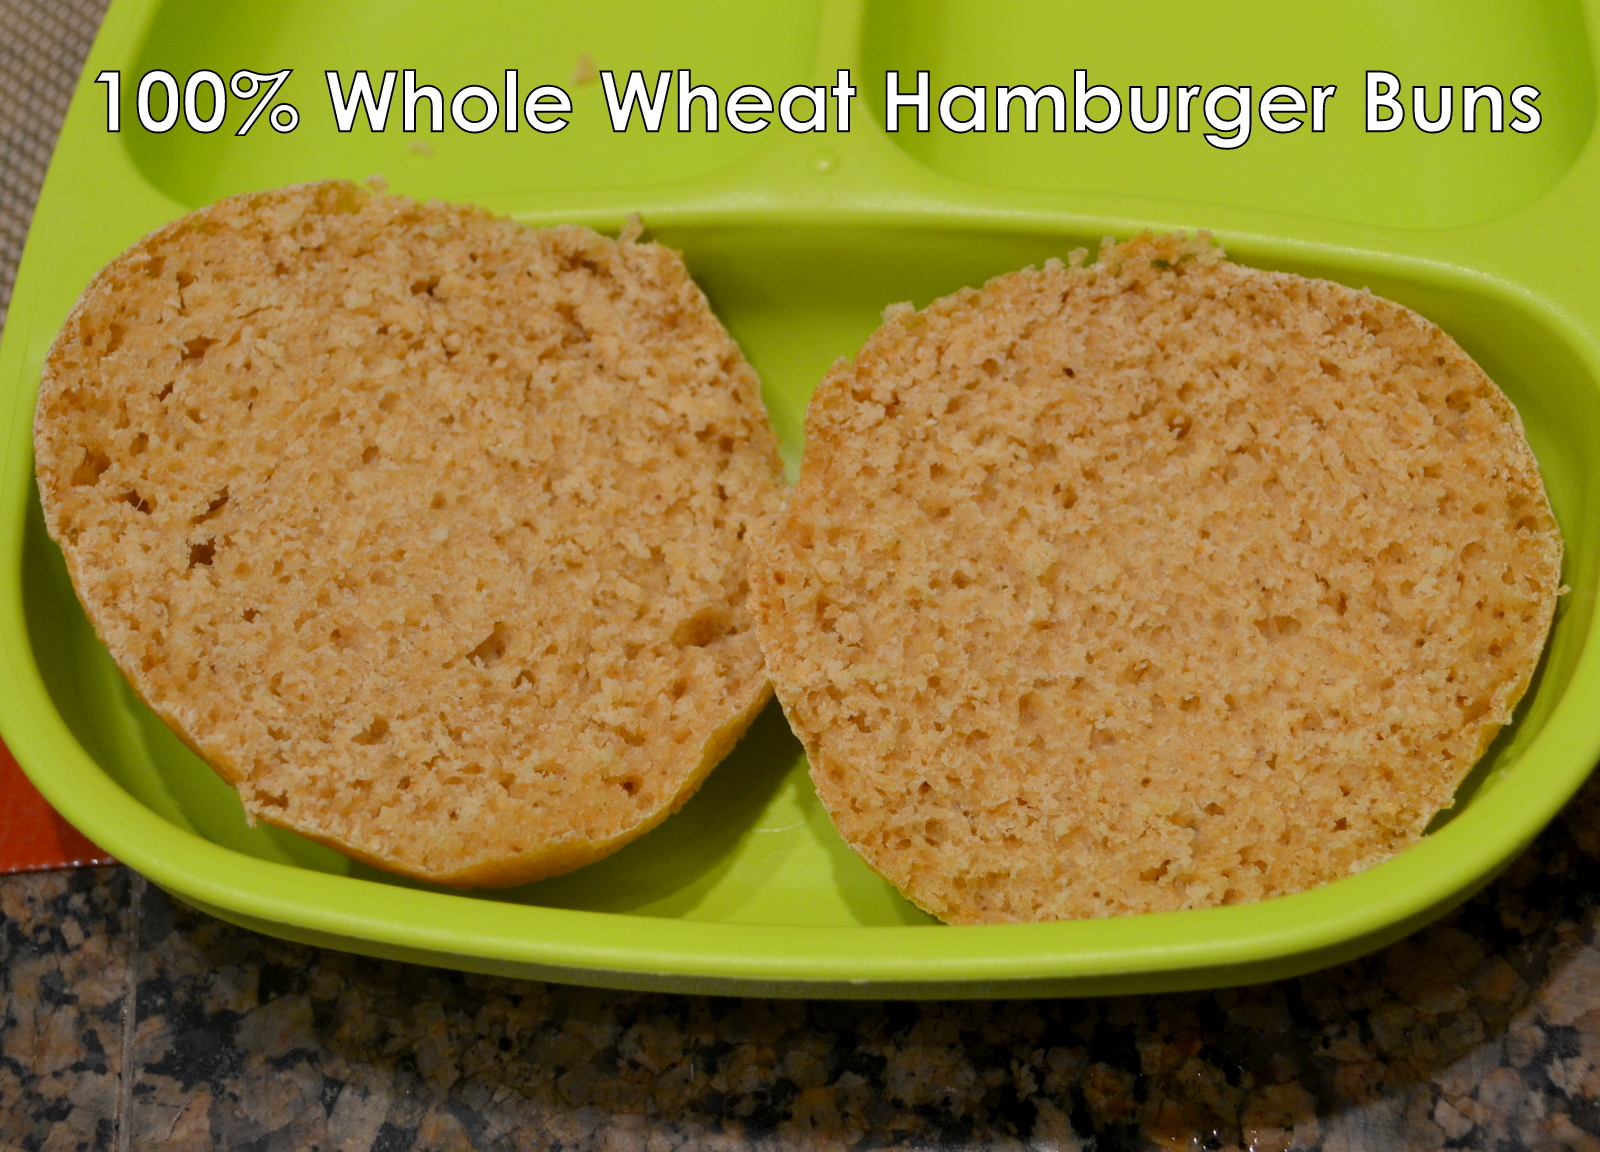
Becca here with a recipe I was thrilled to discover! We enjoy eating the occasional hamburger at home, but the healthier hamburger buns can be quite expensive, and still have a few questionable ingredients. This recipe was the first one that we've really loved! I doubled the original recipe, and use it to make 15 hamburger buns. We eat some that day, and I freeze the rest, unbaked, in 2 separate bags so they're ready to set out to rise and bake later. This dough is very, very easy to work with, and makes a nice soft, but sturdy (and tasty!), bun. Be sure and slice them, as you should all homemade bread products, with a serrated knife so you get a nice clean cut. I've described the steps in pretty great detail, but the buns really do come together quickly, the hands on time is quite minimal, and they are SO tasty!! I make these into a nice dinner portion hamburger bun for a nice 'normal' sized hamburger, without a ton of extra bread left on the edges without meat, as you can see above (these are pictured on a half sheet sized baking sheet). If you're wanting restaurant sized hamburger buns, I would divide the dough into much larger portions. The dough should double in size from what you started with, so use that to gauge how big you want them to be. Baking time will just be a minute or two longer. Enjoy!
100% Whole Wheat Hamburger Buns
{freezer friendly - makes 15 buns}
1 1/2 cup warm tap water
6 teaspoons yeast
4 Tablespoons honey
4 Tablespoons melted butter
2 large eggs
2 teaspoons salt
5 - 6 cups whole wheat flour (I use organic hard white wheat I mill)
In a large mixer bowl, combine warm water and yeast, and allow to sit for 5 minutes. (Mixture should be starting to bubble at this point if your yeast is good!)
Add honey, melted butter, eggs, and beat until smooth. Add 5 cups of the flour and salt and beat until smooth. Add remaining flour (generally up to 1 additional cup, 6 cups total) until the dough is smooth and workable, not sticky. Knead (I let the mixer do this part with a dough hook!) for 6 minutes.
Cover the dough and let it rest for 10 minutes.
Roll dough into a log type shape and cut into thirds. Divide each into desired number of buns; I divide each third into five, one for each member of my family. Quickly form them into a bun shape (this doesn't have to be perfect, they're going to rise quite a bit & get a nice smooth dome on them!). Place the number you're going to bake today onto a greased cookie sheet.
*I prefer to freeze this dough raw, and let it rise & bake 'fresh' the day we'll be eating the buns. Place buns that you'll be baking another day into freezer bags, squeeze as much as as possible out, and place into freezer. See below for finishing instructions from the freezer.
Let the buns rise in a warm spot about an hour; they should double in size. If it's a particularly cool day, I put my oven on the 'warm' setting (100 degrees) for a few minutes, then turn it off and let them rise in there.
Bake at 350 degrees for 15 minutes, or until golden brown. Enjoy!
*From the freezer, remove bag of frozen buns and let defrost in the refrigerator overnight. Place buns onto greased cookie sheet, and place into warmed (I heat mine to 100 for a few minutes, then turn it OFF) oven for about an hour, or until dough has doubled in size. (the dough shouldn't start to 'cook' or change color much at all, your spot is TOO warm it that happens, move them somewhere a bit cooler :) Bake at 350 for 15 minutes, or until golden brown.
And, because I know everyone always loves a good 'inside' shot, here's what one looks like cut open :)
Monday, April 8, 2013
Veggie 'Burgers' {freezer friendly, makes 20}
Becca here with recipe I really hope you'll try! I know "Veggie 'Burger'" probably isn't the first thing on your mind when it comes to a tasty meal, but I really think these are delicious, as do all of my kids, and they are a powerhouse nutritionally as well. I saw this recipe in a library book, and used it as my inspiration. I'd gladly eat them for lunch any day. You can, of course, serve them like a traditional burger, on a bun with your favorite burger toppings, but our favorite way to eat them is with a side of 5 minute guacamole to dip them in. Bulgur is the grain used in these patties, something you may not be familiar with, but is easy to find for me locally at Harps or the natural foods store, both in the bulk bins and packaged. Compared to rice, "bulgur has more fiber and protein, a lower glycemic index, and higher levels of most vitamins and minerals" and has a very neutral taste. The burgers stick together well enough to pick up and eat if you desire to do so, and are an inexpensive (the 'healthier' veggie burgers I like to buy pre-frozen are over $1 each, and not even as nutrient-packed as these are!!) meal to keep in the freezer for a quick meal or snack. Let me know what your family thinks of them, and your favorite way to serve them! Cheese on top? Dipped in ketchup? Lots of possibilities! Enjoy!
Veggie 'Burgers'
(makes about 20 patties, we usually eat 2 each)
1 cup bulgur
2 cups water
3 cups pinto beans (ones you've cooked from dry, or 2 cans, 15 oz. each, drained & rinsed)
1 cup shredded cheese (we like sharp cheddar)
1 cup grated carrot (about 3 medium carrots)
1 teaspoon salt
1 teaspoon granulated garlic
1 teaspoon onion powder
2 Tablespoons oil, divided (I use coconut oil, butter, or olive oil)
Place bulgur and water in small sauce pan and bring to a boil. Turn heat down to low, cover, and simmer 15-20 minutes, or until water is absorbed.
In a large bowl, combine bulgur, beans, cheese, carrots, salt, granulated garlic, and onion powder and stir to combine.
Put half of mixture into food processor or blender, and pulse until pureed. Add back into remaining ingredients in large bowl, and stir to combine thoroughly.
Heat a portion of the oil in a large skillet or griddle (I cook half of the mixture at a time on my large cast iron griddle on the stove top, using 1 Tablespoon of oil for each batch). Make patties out of the mixture, using about 1/4 cup of mixture for each (The mixture will be sticky, just work quickly and lightly with your hands, or scoop onto griddle with a 1/4 cup measuring cup and then gently pat with spatula to flatten), and place onto griddle to cook until golden brown, approximately 3-4 minutes on each side. When done, remove and let cool for a couple of minutes before serving. Enjoy!!
Tuesday, March 5, 2013
Easy 100% Whole Wheat Tortillas {freezer friendly, makes 24 large tortillas}
Becca here with a recipe I'm excited to share! I actually did quite a bit of experimenting with making different types of whole grain tortillas, both corn & wheat, before settling on this recipe that I had the most success with and based this one on. Tortillas are great for so many quick meals, different types of wraps, enchiladas, quick quesadillas that are perfect for whatever leftovers you have left in the fridge plus a bit of cheese, etc. but the 'regular' white flour ones are really pretty nutritionally void, plus have a lot of preservatives and other things I generally avoid. And the much 'better' ones are too expensive for me to buy regularly for my growing family. The recipe I'm sharing below was the all around winner, both in taste and ease of preparation. The dough is very forgiving and easy to work with; I haven't ever had trouble with quickly rolling the dough out, or with holes or tearing when transferring them to the griddle, something I had trouble with other recipes' doughs doing. It's really a very basic recipe, requiring just 4 ingredients, including water! The actual hands on time is probably significantly less than what you are expecting also; I can have 24 large (this is a large dinner plate they're sitting on here, these are big tortillas!) tortillas made on my large griddle, cooking 2 at a time, easily in 30 minutes, including rolling out time, etc., and still be fixing the other things to go with them while they cook. You can store them in an airtight container in the refrigerator for a couple of days, or freeze in a large ziptop bag until you're ready to use them. As I take them off of the griddle, I stack them onto a plate topped with another plate of the same size (it's okay if they overlap a little bit) to keep them warm, moist, & pliable until they're all finished and we're ready to eat. Don't let the length of the directions fool you either; although you do have to plan ahead a bit to allow the dough to rest, you basically just roll out the dough & cook it on the griddle. Since I think this is something brand new for a lot of people, as it was for me, I'm elaborating a bit more on what worked (and didn't) for me and what to watch for along the way to make sure you get great results from the first time. I've been making these for a month or so now, and my only warning is that they are SO good you'll have a hard time eating 'store bought tortillas' again! Enjoy!!
Easy 100% Whole Wheat Tortillas
{freezer friendly, make 24 large tortillas}
5 - 6 cups whole-wheat flour (I use Organic Hard Spring Wheat that I grind fresh in my mill, but King Arthur’s white whole wheat flour is my favorite pre-ground purchased flour)
1 cup oil (My favorite is half olive oil & half coconut oil, but either one of those or your favorite oil would be fine)
2 teaspoons salt
2 cups warm water
In the bowl of a large mixer (ie Kitchenaid or Bosch), add flour, oil, and salt. Using the dough hook, mix for 3-4 minutes, or until well combined & crumbly.
Keep the mixer running, and slowly pour the warm water in. Let it mix another 2-3 minutes. At this point the dough should be not sticking to the sides of your bowl, and very moist, yet not sticky to the touch (kind of like play dough); it shouldn't leave a gooey mess on your hands if you touch it. If it does, continue to add flour while mixing until the desired consistency is reached. I have added up to nearly another cup.
Remove the dough from the mixing bowl, and place it onto a very large flat baking pan (half sheet size is best). Roll it into a log/rope cylindrical type shape. Cut (I use a dough scraper/chopper that I also use when making large batches of bread for this) the dough into half, then half again, so you're have 4 pieces that are fairly even in size. Quickly cut each of these into half again, and then into thirds, so you have 24 fairly consistently sized pieces of dough. Make sure they aren't touching each other, and then cover the whole pan tightly with plastic wrap (or a lid if you happen to have something that will cover your pan!) and let the dough rest for 15 - 60 minutes.
When ready to cook, heat griddle or large skillet and lightly grease. Ideally, you want it to be nice & hot before you add the first tortilla. I use a cast iron griddle on two burners of my gas stove top, and keep the larger burner set on medium/low, and the smaller burner set on medium/high. Working with one ball of dough at a time (leave the rest covered while you work), quickly roll it out to about 8-10 inches in diameter. I do this on a completely flat, edgeless cookie sheet. If the dough is sticking, though I haven't had problems with that at all, use a little bit of flour to prevent. I don't worry about making them a perfect circle, I just roll a couple of times in each direction until it's the correct size, and then quickly carry it to the griddle and lay it down. It doesn't take long at all on each side to cook. Although the exact time will vary depending on your appliances, 30 - 60 seconds should be all it takes per side. If it's taking longer than that, I'd definitely turn the heat up a bit. You'll know it's time to flip the tortilla when it's darkened slightly all over and looks less 'moist', and you can easily scoot it around, and then flip it, on the griddle. It should hold its own, and not tear or anything, and start to have some nice 'tortilla looking' brown marks on it :) Cook an additional 30 - 60 seconds on the second side (this is a great time to go ahead & roll another tortilla out so it's ready to go!), then remove to a plate covered with another plate, turned upside down, to stay warm until ready to serve.
Repeat, and before you know it you'll have a plate of tasty, healthy tortillas you made yourself!! I'd love to hear how your tortillas turn out!
In the bowl of a large mixer (ie Kitchenaid or Bosch), add flour, oil, and salt. Using the dough hook, mix for 3-4 minutes, or until well combined & crumbly.
Keep the mixer running, and slowly pour the warm water in. Let it mix another 2-3 minutes. At this point the dough should be not sticking to the sides of your bowl, and very moist, yet not sticky to the touch (kind of like play dough); it shouldn't leave a gooey mess on your hands if you touch it. If it does, continue to add flour while mixing until the desired consistency is reached. I have added up to nearly another cup.
Remove the dough from the mixing bowl, and place it onto a very large flat baking pan (half sheet size is best). Roll it into a log/rope cylindrical type shape. Cut (I use a dough scraper/chopper that I also use when making large batches of bread for this) the dough into half, then half again, so you're have 4 pieces that are fairly even in size. Quickly cut each of these into half again, and then into thirds, so you have 24 fairly consistently sized pieces of dough. Make sure they aren't touching each other, and then cover the whole pan tightly with plastic wrap (or a lid if you happen to have something that will cover your pan!) and let the dough rest for 15 - 60 minutes.
When ready to cook, heat griddle or large skillet and lightly grease. Ideally, you want it to be nice & hot before you add the first tortilla. I use a cast iron griddle on two burners of my gas stove top, and keep the larger burner set on medium/low, and the smaller burner set on medium/high. Working with one ball of dough at a time (leave the rest covered while you work), quickly roll it out to about 8-10 inches in diameter. I do this on a completely flat, edgeless cookie sheet. If the dough is sticking, though I haven't had problems with that at all, use a little bit of flour to prevent. I don't worry about making them a perfect circle, I just roll a couple of times in each direction until it's the correct size, and then quickly carry it to the griddle and lay it down. It doesn't take long at all on each side to cook. Although the exact time will vary depending on your appliances, 30 - 60 seconds should be all it takes per side. If it's taking longer than that, I'd definitely turn the heat up a bit. You'll know it's time to flip the tortilla when it's darkened slightly all over and looks less 'moist', and you can easily scoot it around, and then flip it, on the griddle. It should hold its own, and not tear or anything, and start to have some nice 'tortilla looking' brown marks on it :) Cook an additional 30 - 60 seconds on the second side (this is a great time to go ahead & roll another tortilla out so it's ready to go!), then remove to a plate covered with another plate, turned upside down, to stay warm until ready to serve.
Repeat, and before you know it you'll have a plate of tasty, healthy tortillas you made yourself!! I'd love to hear how your tortillas turn out!
Thursday, February 28, 2013
Roasted Tomato Soup
Becca here with a guest post today that I'm so excited about! My friend Mindy kept posting pictures on Facebook of this Roasted Tomato Soup that looked SO delicious, I asked her if she would mind sharing the recipe with us today, and was excited when she agreed to!
Mindy, friend of Becca here. I used to
joke that my mom's idea of cooking was dialing Pizza Hut, but there is truth in
that. I was 23 before I knew what garlic was, and I literally thought
adding meat to hamburger helper was cooking "from scratch" (gasp!).
Fast forward a few years, and I'm pleased to say I've figured out REAL
food doesn't come in a packaged box, and garlic and I have become fast friends.
In fact, this is one of my favorite recipes with garlic. When you
roast garlic, it gets this robust, almost creamy nutty flavor. When you
roast tomatoes, they take on a rich, sweeter flavor. Add the two
together...pure
yumminess!! It took a few tries to perfect this recipe, inspiration from here, but I think I've
finally got it--my 4 year old ate 4 bowls of it (which is high praise, coming
from her!). Add some cheese on top if you'd like (we use a Mexican
blend), or serve with a grilled cheese sandwich! It makes 2 meals for us for
less than $10, and with Becca's freezer tips she posted on Jan. 24th, I'm
looking forward to making double and freezing it next time for those busy days!
Enjoy!!
Roasted Tomato Soup
Ingredients:
3.5 – 4lbs
tomatoes
7 (unpeeled)
garlic cloves
Olive oil
Salt
2 Tbs.
unsalted butter
1 onion,
chopped
2 Tbs. sugar
1.5 tsp. dried
oregano (or ¾ tsp. if you only have ground oregano)
¼ tsp.
pepper
3 cups
chicken broth
½ cup cream
Cheese for
topping, if desired
1) Cut the tomatoes in half, and arrange them on a baking sheet with the unpeeled garlic. Drizzle generously with olive oil and sprinkle generously with salt. Roast them for an hour in a 350 oven, then let them cool while you do the next step.
2) Melt 2T butter over in a pot over medium heat, then add onions and cook until tender or translucent—about 4-5 minutes. Add sugar, oregano and pepper and cook 1-2 more minutes. Unpeel the garlic, then add garlic, tomatoes and chicken broth to the onion mixture. Bring to a boil, then reduce to a simmer for about 45 minutes and let the flavors meld for a bit. The longer it sits, the more time the flavors get to mingle. Mingling is good J
1) Cut the tomatoes in half, and arrange them on a baking sheet with the unpeeled garlic. Drizzle generously with olive oil and sprinkle generously with salt. Roast them for an hour in a 350 oven, then let them cool while you do the next step.
2) Melt 2T butter over in a pot over medium heat, then add onions and cook until tender or translucent—about 4-5 minutes. Add sugar, oregano and pepper and cook 1-2 more minutes. Unpeel the garlic, then add garlic, tomatoes and chicken broth to the onion mixture. Bring to a boil, then reduce to a simmer for about 45 minutes and let the flavors meld for a bit. The longer it sits, the more time the flavors get to mingle. Mingling is good J
3) Take the
contents of the pot and pour into a blender or juicer, or use an immersion
blender to puree. I pour mine into our Vitamix
(those things are fantastic!) and it pulverizes all the seeds and skin. If your
device does not puree things like that, then when you’re done blending, pour
the mixture through a strainer to remove extra bits of skin or seeds.
4) Once the
tomatoes are pureed, pour into the pot over medium low, and add ½ cup of cream,
and stir until heated through (do not let it boil), then serve.
Tuesday, February 19, 2013
Sweet & Sour Meatballs {freezer friendly - makes 6 meals}
Becca here with a really tasty meal that you'll love having in the freezer. Even better, you can just pour it into the slow cooker to heat up, so it couldn't be easier! Honestly, meatballs aren't my favorite thing to make, but my family and I do like to eat them, and the ones you can buy at the store are full of fillers & other things we try to avoid. Plus, the homemade ones taste SO much better! I like to make a huge batch at a time, so all of the messy work is done at one time. In fact, this is our very favorite meatball recipe, and I often make two huge batches of meatballs at a time, one for this Sweet & Sour, and one for the Stroganoff Meatball recipe I posted last week. My inspiration recipe that I follow fairly closely is from Fix, Freeze, Feast. I like to serve the meatballs & sauce over brown rice or noodles, with stir-fry veggies on the side. I use a rice cooker so I just add the rice & water and let it do all of the work, but you can prepare either rice or noodles ahead of time and freeze it to go with the meatballs as well if you prefer. Enjoy!
Sweet & Sour Meatballs
{freezer friendly - makes 6 large meals}
Meatballs:
6 pounds lean ground beef
3 cups dry bread crumbs (whole wheat homemade preferred, I buy them if I don't have any made though)
2/3 cup milk
4 large eggs
1 medium/large minced onion
2 Tablespoons minced garlic
1 Tablespoon salt
1 Tablespoon black pepper
Sauce:
2 cups brown sugar
1/2 cup cornstarch
1 huge can (106 oz) pineapple tidbits
1/2 cup soy sauce
2 1/2 cups red wine vinegar
Preheat oven to 500.
In a large bowl (really large, the largest one you have) combine all meatball ingredients (beef, bread crumbs, milk, eggs, onion, garlic, salt, and pepper). Start stirring to combine. I usually start with a large wooden spoon, and then use my hands to make sure everything is thoroughly blended.
Form into meatballs approximately 1 - 1 1/2 inches in size, and place onto large rimmed baking sheet. Bake at 500 for 15 minutes, or until no longer pink inside (a meat thermometer inserted into the center should read 160). Allow meatballs to cool to room temperature.
Meanwhile, drain pineapple tidbits juice into a large pot. Add in remaining sweet & sour sauce ingredients (brown sugar, cornstarch, soy sauce, and red wine vinegar) but NOT the actual pineapple tidbits! Stir well to combine. Cook on medium level heat, stirring occasionally, until the sauce thickens, about 20 minutes. Allow sauce to cool to room temperature.
Divide pineapple tidbits, meatballs, and sauce evenly among freezer containers (I use 6 gallon freezer ziploc bags, each with about 20 meatballs in them).
When ready to serve: Thaw in refrigerator overnight. Add contents of bag to slow cooker & cook on low a few hours, until heated through and sauce is bubbling, or bake in the oven for 30 minutes at 350 until heated through and sauce is bubbling. We enjoy them served over brown rice, with stir-fry veggies on the side.
Thursday, February 7, 2013
Baked Potato Soup {freezer friendly - 24+ Servings}
Becca here with another recipe of a "freezer friendly" series I'm going to be continuing the next few weeks on Tuesdays & Thursdays. Baked Potato Soup is always a crowd pleaser, and my family is no exception to this rule! The great thing about this warm & hearty recipe is that it is really economical, even using organic potatoes, and very tasty. It is also meatless, but I don't think anyone will ever miss it, the soup is very, very rich and makes a great main dish on its own. In fact, I often serve it with carrot sticks, sugar snap peas, or something else similar & light to balance out the richness of the soup. I find that it takes far less in quantity to fill everyone up when the recipe is more filling, which is definitely the case here. Be sure and save the (mostly) hollowed out potato skins, don't throw them away, to make stuffed potato skins, or potato "boats" as my boys like to call then, recipe coming next! Since the recipe (I based mine on a chowder in this cookbook but made several changes) calls for ten pounds of potatoes, and standing there scrubbing them didn't sound like a fun chore at all, I decided to try out a much quicker (and more fun) method for washing them that I'd seen on a blog recently.
Yes, I placed them all into my clean and empty dishwasher and ran it on the rinse cycle. I actually ran it through twice just to be double sure, although they did look nice & scrubbed clean after the first time. Our Mom happened to be at my house while I was doing this and seemed to think it was a bit (or more) odd that I was loading the dishwasher with potatoes, but I was really happy with the results, and my poor eight-month pregnant feet were too, since I didn't have to stand there scrubbing potatoes!
Baked Potato Soup {Freezer Friendly - 24+ Servings)
10 pounds russet potatoes
1 cup butter (2 sticks)
2 medium/large onions, chopped (about 2 cups)
2 Tablespoons granulated garlic (minced would be fine too)
2 teaspoons salt
2 teaspoons pepper
2 cups flour (I use whole wheat)
12 cups chicken broth (I use easy homemade) OR water and bouillon to measure 12 cups
4 cups half & half OR cream
1 pound sharp cheddar cheese, cut into 1" chunks, or grated
storage containers for freezing, if desired (I use 4 gallon freezer ziploc bags for this recipe)
Optional toppings for serving: shredded cheese, green onions or chives, bacon bits, etc.
Bake clean potatoes on a large baking sheet in the oven at 350 for one hour, or until tender. Let cool for about 15 minutes. Cut into half, and scoop flesh out into a large bowl. I do this carefully and leave a bit of potato on the skin so that I can make stuffed potato skins also (recipe coming Thursday).
In a large pot (the biggest one you have!), melt butter. Add onions and cook, stirring occasionally, until soft, about 5 minutes. Add garlic, salt, pepper, and flour and cook, stirring constantly, for another minute or two. The mixture will be thick and like a paste, don't panic!
Gradually stir in broth, half & half, and then potatoes, and continue to heat, stirring ever few minutes, until mixture has thickened, about 30 minutes. I turn the heat on medium, you don't want it to turn or boil.
Add cheese, and stir until melted. Taste and add more salt & pepper, as desired (this will largely depend on the type of broth or bouillon you have used). Serve immediately, or let cool to room temperature, and freeze into desired portions.
Tuesday, October 30, 2012
Layered Baked Spaghetti (Makes 2 - Freezer Friendly)
Becca here with a recipe I've been making for several years. In fact, I distinctly remember making it to have in the freezer before my middle child was born, and he's now nearly 4 1/2! It was originally from Taste of Home Magazine, and I've made a few changes over the years, mainly cutting out the cream soup. I love the creamy middle filling, it adds a nice surprise to the traditional baked spaghetti or ziti dish. I like to make it at the same time as the Pasta Taco Bake I posted on Tuesday. Since both use ground beef and pasta, you can just rinse the pan before cooking the 2nd type of pasta, for example. I can have both dishes done, for a total of 4 good sized casseroles, in an hour this way.
Spaghetti Casserole (makes 2)
2 pounds ground beef (or turkey)
1 large onion, chopped
2 packages (12 oz. each) thin spaghetti, cooked
1 large jar (26-32 oz) spaghetti sauce
1 large can (28 oz.) petite diced tomatoes
1 can (15 oz.) tomato sauce
1 teaspoon balsamic viniagrette
2 cups sour cream
2 cups cottage cheese
1 teaspoon pepper
1/2 teaspoon salt
2 cups shredded cheese (I use sharp cheddar usually)
Cook beef and onion in large pan over medium high heat until beef is no longer pink. Stir in spaghetti sauce, diced tomatoes, tomato sauce, and balsamic viniagrette. Simmer over medium low heat for 10 minutes.
Meanwhile, in a separate bowl, combine sour cream, cottage cheese, salt, and pepper, and stir to combine well.
In lightly oiled pans (I use one 9x13 and one 8x8 pan) layer meat sauce, cooked pasta, and sour cream mixture. Repeat layer, and top with shredded cheese.
To serve immediately: Cover, and bake 55-65 minutes, or until bubbly and cheese is melted.
To freeze one or both and serve later: Tightly cover casseroles, and store in the freeze. Defrost overnight in the refrigerator. Remove from the refrigerator 30 minutes before baking. Cover and bake for 55-65 minutes, or until bubbly and cheese is melted.
Tuesday, October 2, 2012
Taco Pasta Bake (Makes 2 - Freezer Friendly)
Becca here with a great recipe I saw here and adapted to make it freezer friendly, and make two dinners just as easily as one. That way you can eat one and have one ready for a meal later, or have a great meal to take to a friend plus dinner for your family as well. Feel free to serve with traditional taco toppings, such as sour cream, avocado, salsa, or black olives, whatever is your family's favorite & you have on hand. My whole family really enjoyed this dish; the creamy casserole topped with crunchy chips was a great variety in texture, and the flavor was great too! Enjoy!!
2 pounds ground beef (or turkey)
1 large onion, chopped
2 packets taco seasoning, or make your own
1 large can (29 oz.) tomato sauce
2 cans (14.5 oz each) diced tomatoes with green chilies (Rotel)
1 teaspoon salt (I use real salt)
16 oz. frozen corn
2 cans (4 oz. each) chopped green chilies
12 oz. rotini, cooked
4 cups crushed tortilla chips
2 cups shredded cheddar cheese (I use sharp cheddar)
In a large pan over medium-high heat until meat is no longer pink. Drain, return to the large pan, and add taco seasoning, tomato sauce, rotel tomatoes, tomato sauce, and salt. Stir well, turn heat down to medium low, and simmer for 10 minutes. In a separate large saucepan, cook pasta according to package directions.
Drain pasta and return to large saucepan. Add frozen corn, chopped green chilies, and tomato/beef mixture and gently stir to combine. Pour mixture into two lightly oiled 8x8 pans, or pans of a similiar size. I use oval corningware often also.
If serving immediately: Bake for 10 minutes at 350. Top each with 2 cups crushed tortilla chips and 1 cup of cheese, and bake another 10 more minutes.
If freezing one or both casseroles to serve later: Tightly cover baking dishes. Place 2 cups of crushed tortilla chips and 1 cup of shredded cheese per casserole into a zip top bag, and secure to the top (I use a rubber band wrapped around them both, or top with another layer of foil to hold it all together. Including baking directions: Defrost overnight in the fridge, then bake at 350 for 30 minutes, top with crushed tortilla chips and cheese, and bake an addition 10 minutes, or until heated through. Enjoy!
Thursday, September 27, 2012
Spicy + Creamy Chicken Quesadillas (freezer friendly, makes 25!)
Becca here with a really yummy recipe that's very freezer friendly! Sara first introduced me to these baked chicken taquitos a couple of years ago. While the recipe is great 'as is', heating the corn tortillas, and then rolling each individual taquito is a bit more time than I usually care to spend on dinner for my growing family of 5. I've made a few other adaptations as well, so that you can quickly prep and cook these yummy quesadillas for a great weeknight meal. Please note that the recipe makes approximately 25 quesadillas, so you'll have plenty to freeze for later! And though these do have a bit of spice to them, my children eagerly eat them without a problem :) They taste very fresh and are a great change from the traditional freezer meal casserole. I use a griddle to quickly heat them up, and serve them with my "Restaurant Style" Salsa on the side. Enjoy!
Spicy + Creamy Chicken Quesadillas
16 oz. cream cheese
1 1/2 (16 oz. jar) green salsa
2 Tablespoons lime juice
2 teaspoons chili powder
1 teaspoon onion powder
1 teaspoon granulated garlic
1/2 cup chopped fresh cilantro
1 cup sliced green onions (I use the white & green part)
4 cups cooked, shredded chicken
2 cups shredded cheese (I use sharp cheddar)
Approximately 50 small corn tortillas
salsa, sour cream, etc. for serving with, optional
In a large mixing bowl, add cream cheese & microwave for about 30 seconds so that it's easy to stir. Add green salsa, lime juice, chili powder, onion powder, and granulated garlic. Stir well to evenly combine, and then add cilantro, green onions, chicken, cheese, and combine well.
Add approximately 1/3 cup of filling onto a corn tortilla. Spread onto the tortilla, staying away from the very edges (as they cook, the filling will spread to the edges, you don't want it oozing out & losing it!). Top with another corn tortilla. Repeat with remaining ingredients!
To use immediately: Heat large skillet or griddle to approximately 350 (medium high on the stove top). Add a bit of butter or your favorite cooking oil. Top with quesadillas. Cook a few minutes on each side, until golden brown. Enjoy!
To freeze: Stack quesadillas in quart size zipper bags. I can fit 7 into one quart size bag. Defrost in the refrigerator overnight, then proceed with instructions above for using immediately.
Tuesday, September 25, 2012
Slow Cooker Mongolian Beef (freezer friendly)
Becca here with one of my family's favorite meals for several years now. An extra bonus is that it's very freezer friendly, and cooks in the slow cooker! I like to buy beef stew meat in bulk and freeze it in quart zipper bags with the sauce ingredients so all I have to do is pour the bag into the slow cooker and it's ready to go at dinner time! It doesn't get much quicker or easier than that! I think it tastes just like a dish you'd get at a good Asian Restaurant, and the beef is so tender it literally falls apart. I serve it over brown rice or quinoa with a bit of the sauce drizzled on top to make it extra yummy. Enjoy!
2 pounds beef stew meat
1 Tablespoon dried ginger
2 Tablespoons minced garlic
1/2 cup soy sauce
1/2 cup water
3/4 cup brown sugar (or organic cane sugar)
4 large green onions
Combine all ingredients in slow cooker and cook on low 4-6 hours or until meat is cooked throughout & very tender. The time will vary depending on the size of the stew meat chunks, as well as your slow cooker. Over the years I've owned 2-3, and found that each of them cook at different speeds.
If making for the freezer: Double or triple recipe, adding each batch into a quart sized zipper freezer bag. When ready to cook, add contents of bag to slow cooker and cook on high 6-8 hours or until cooked throughout & tender.
Subscribe to:
Posts (Atom)