Showing posts with label Side Dishes. Show all posts

Monday, January 11, 2021

Country Cornbread


Country Cornbread

1 cup yellow cornmeal

1 cup all purpose flour

1 tablespoon baking powder

1/2 teaspoon salt

1 cup milk

2 large eggs

1/4 cup cooking oil 


1. Preheat the oven to 425 degrees F, and grease the inside of a glass 8x8 baking dish to prevent the cornbread from sticking. (you can also use a cast iron skillet)

2. In a large bowl, stir together the cornmeal, flour, baking powder, and salt until combined.

3. In a separate bowl, whisk together the milk, egg, and oil.

4. Add the wet ingredients to the bowl of dry ingredients, and stir just until everything is combined. (don't over stir) 

5. Pour the batter into the baking dish, and bake for about 20 minutes. (or until the top and edges are golden brown)

Enjoy! 
 

Wednesday, December 16, 2020

Garlic Cheddar Drop Biscuits


Garlic Cheddar Drop Biscuits

*Makes 12 biscuits 

2 cups all purpose flour

2 1/2 teaspoons baking powder

1 teaspoon sugar

1/2 teaspoon salt 

1/4 teaspoon baking soda

2 teaspoons garlic powder

1 cup milk

1/2 cup butter

1 cup shredded cheddar cheese

*For the butter topping:

3 tablespoons butter, melted

1/2 teaspoon garlic powder

1/2 teaspoon Italian seasoning 


1. Preheat oven to 450 degrees F. 

2. Mix together flour, baking powder, sugar, salt, baking soda, and garlic powder. Cut in butter until crumbly. (I prefer to grate the butter, then cut it in)

3. Stir in milk and cheese.

4. Drop dough by heaping spoonful onto a parchment lined baking sheet.

5. Bake 10-12 minutes, or until lightly browned.

6. While baking, combine the topping ingredients. 

7. Remove from oven, and let cool for 3 minutes before brushing with the butter topping. 

Enjoy!

Thursday, March 9, 2017

Curried Lentils


Jana here with a delicious way to cook lentils! We like to include lentils in our diet, because they are an inexpensive, healthy way to add fiber and protein!  I typically make these Curried Lentils as a side dish, along with a vegetable and chicken, but you could easily double the recipe and eat it as a soup as well. I was using green lentils for this recipe, but also buy red split lentils sometimes too. Either would work well with this.

Curried Lentils

1 cup dried lentils
2.5 cups chicken broth
1/2 cup canned coconut milk
1.5 tablespoons curry powder
1/2 teaspoon turmeric
1/2 teaspoon salt
1/2 teaspoon pepper

1. Combine the dried lentils and chicken broth in a medium size pot. Bring to a boil, then cook on low heat for 20-30 minutes.

2. Stir in the coconut milk, and spices until well combined. Cook on low heat for 5 minutes.

Enjoy!

Monday, February 13, 2017

{Instant Pot} Black-Eyed Peas


Jana here with another Instant Pot recipe!  I have been trying to buy more dried beans, rather than canned. Like many other things, they are a better value, and can be healthier.  Once I have cooked the dry beans, I like to portion them into glass jars, and freeze them for future meals. I use mason jars for this, or other glass jars that I save from foods like salsa or pickles. Using a funnel will make pouring the beans into the jars a much easier process. Also, make sure to leave plenty of empty space at the top of your jar to allow for expansion once the beans are frozen.  I also like to put a label on the lid of the jar so I remember what exactly is in the jar. While soaking beans ahead of time is optimal, I typically forget to do that. So my recipe below will be for unsoaked beans. This is a base recipe, but you could easily add in some chopped ham, or chopped onion!

{Instant Pot} Black-Eyed Peas

1 pound dried black-eyed peas
6.5 cups water  (or chicken broth)
2 teaspoons salt
1 teaspoon pepper

1. Rinse the dried beans, and place in the Instant Pot. Add enough water to cover, plus 1-2 inches.
Season with salt and pepper.

2. Put the lid in place, and make sure the top knob is turned to "sealing". Set on Manual mode for 20 minutes.* Once they have cooked, use Natural Release before opening.

3. At this point, I like to taste the beans, and add seasonings from there. Sometimes, I add in a packet of real bacon pieces, or 1/2 cup cooked/crumbled bacon. I also like to add spices such as paprika, thyme, garlic and onion powder. If you are unsure about amounts of each seasoning, start with 1/2 teaspoon, and go from there.

*I find that people's preferred softness for beans can vary quite a bit. The suggested 20 minutes cook time is a middle of the road approach. If you know you prefer a very soft bean, I would suggest going to 25 minutes. Likewise, if you prefer a firmer bean, I would decrease to 15 minutes.

Enjoy!

Printable Version

Sunday, January 15, 2017

Sauteed Bacon & Fresh Spinach


Becca here with one of my family's favorite side dishes.  In fact, when I made this again a few nights ago, I had almost everyone asking for seconds, and it was all gone, even though I had used a full pound of fresh spinach!  I really think even two pounds of fresh spinach wouldn't have had any leftovers either!  This is a super quick and simple recipe, with just two ingredients, bacon and spinach.  It really is delicious though, and a great way to get a lot of veggies in really easily.  Don't let the two full packs of bacon in the photo scare you away, I just use half of one pack, but wanted to picture my two favorite bacons.  I always use either the Oscar Mayer "Natural" one without nitrates, or Farmland Naturally Hickory Smoked "Double Smoked" (my very favorite, but it does have nitrates, etc., and the Oscar Mayer is almost as good, though more expensive).  I like to go ahead and cut up, and then freeze, the other half of the package of bacon, so that it's ready to go next time I have a full tub of spinach to use!

Sauteed Bacon & Fresh Spinach

1/2 of a 12-16 ounce package of your favorite bacon
16 ounce package of spinach (I always use this Taylor Farms Organic Baby Spinach from Sam's Club)

I use kitchen shears to quickly cut several slices of bacon at once into small, bite sized pieces.  Add them to a large pot.

Stirring occasionally, cook the bacon on medium-high (I usually do 6.0 on my stovetop that has a range from 1-10) until it is browned and crispy.

Immediately start adding big handfuls of the spinach, until all 16 ounces have been added.  It will seem like a ton of spinach, but will quickly cook down.

Cook for an additional five minutes, gently stirring occasionally, until the spinach is bright green, and wilted.  Serve immediately.

Be careful not to overcook, you don't want it to be dark green and mushy!!

Saturday, January 7, 2017

{Instant Pot} "Baked" Sweet Potatoes

Becca here, with a quick "Instant Pot" pressure cooker recipe/tutorial.  I have been an avid Instant Pot user for seven years now, and am actually on my second Instant Pot, after an unfortunate incident with the lid being left too close to our gas stove, and melting.  When we had a major water leak at our home, requiring my family of myself, my husband, and our five kids, to live in a hotel for exactly sixty nights, my Instant Pot is the one kitchen thing I brought with me, and enabled us to eat somewhat normally some of the time, while living in a hotel!  I'm super excited that they have become really popular lately, and recipes are showing up all over, so I thought I would add some of my favorites to the mix now that it's something many more people have in their kitchens!


One thing that I commonly use mine for is to make perfect "baked" sweet potatoes.  To get great results, with non-mushy sweet potatoes, you'll want to get out the steam rack that came with your instant pot.  It looks like this, once placed into the bottom of the stainless steel pot insert (which I have two of, and often use each of them every day!).  You want to make sure that it is feet side down.  Pour in 1 cup of water.  The water will not be touching the bottom of the steam rack.

Insert sweet potatoes.  It is okay to stack them up, as long as the lid will fit on without touching them.  I can generally fit about five pounds of sweet potatoes in mine at one time.   I have a larger than typical family, so this is two meals worth for us.  We usually eat them 'baked' the first meal, and then I put the leftover ones into a square casserole dish with a bit of maple syrup, cinnamon, and sprinkled with pecans and coconut oil on top, for an oven-ready side dish for another meal.

You want to cook the potatoes for 30 minutes at high pressure.  You may do that by pushing either one of two buttons.  Either the Bean/Chili button I'm pointing to here, OR

the "Soup" button I'm pointing to here.  You could also manually set the pot to high pressure for 30 minutes, but I'm not sure when you would go to the extra trouble when either of these buttons work perfectly with preset settings!

The Instant Pot will pause for a moment, and then switch to the screen reading "On".  This means that it is heating up, and building up pressure.  This will take several minutes.

When the Instant Pot has reached the correct temperature and pressure settings, it will start counting down the remaining time "at pressure".  I think this is confusing to people sometimes, because a 30 minute setting actually takes quite a bit longer, allowing for the Instant Pot to heat up and reach pressure, and then naturally release pressure, unless you're in a hurry, and to a quick pressure release.  These are often abbreviated in Instant Pot Recipes/Groups as NRP (natural release pressure) and QPR (quick pressure release).  Natural pressure release simply means that you don't do anything at the end of the cooking time, and let the Instant Pot automatically switch to the "warm" setting, and open the pot to eat when you're ready.  Quick pressure release means that you move the valve on the top of the pot, to "open" to let the big burst of heat and pressure out, so that you can then safely remove the lid and eat, before the pot has naturally and slowly let the steam and pressure out itself.

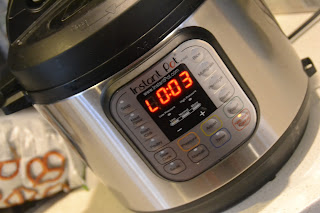
At the end of the cooking time, the Instant Pot automatically switches to a "warm" setting, where the screen looks like this, and it counts up the warming minutes, or hours, if applicable, and slowly starts lowering the pressure.  Because it is an airtight and sealed environment, I have found that even something like rice can stay on the warm function for several hours without any loss of quality at all.

What are your Instant Pot questions or recipe requests?  Or favorite tips?  Let us know in the comments here, or on our Facebook Page!!

Thursday, January 5, 2017

{Instant Pot} Cauliflower Rice

 *This is a great recipe to have children help you make!


Jana here with another really simple, and very versatile recipe you can make in your Instant Pot!  Many people are trying to cut carbs in their diet, and this recipe is an easy way to do just that. Using a head of cauliflower, you can make a rice substitute!  My family ate it this time as a type of 'rice bowl', along with mexican seasoned (DIY taco seasoning here) shredded pork, beans, lettuce, salsa, Greek yogurt (we substitute plain Greek yogurt for sour cream), etc.  Instead of shredded pork, you could also use shredded chicken, or ground beef. When the cauliflower rice is mixed in with all of these other ingredients, it truly was just as good (or better!) as rice would have been!  My children all enjoyed it a lot!

There are many other uses for cauliflower rice, as well. Most recipes where you would typically reach for rice, give the cauliflower rice a try!  Some ideas include: chicken curry, red beans and rice, or creamy chicken over rice.

{Instant Pot} Cauliflower Rice

1 head cauliflower
1 cup broth or water
salt and pepper

1. Place the trivet in the bottom of the IP, and pour the 1 cup of liquid into the bottom.

2. Cut the head of cauliflower into small florets, and set those on top of the trivet.

3. Secure the lid of the IP (making sure the valve is pointed towards the back- Sealing), and push Manual, Set the timer for 4 minutes.

4. Once it has reached pressure, and cooked the 4 minutes, most the pressure valve to Venting, to do a quick pressure release.

5. When the pressure is released, carefully open the lid, and remove the florets. Put them in a bowl, and use a fork to cut them into rice like pellets. Season with salt and pepper.

Enjoy! If you make this recipe, leave a comment and let us know!

Monday, June 23, 2014

Herb Cream Cheese


Hi everyone!  I have the tastiest, quickest recipe to share with you today. This herb cream cheese is perfect for pairing with crusty bread and I've even eaten it on top of scrambled eggs.  It's great for a crowd because it is seriously simple to make but tastes very decadent.  We use the herbs from our garden, but you could also easily buy some at your local Farmer's Market or grocery store. 

Herb Cream Cheese
Ingredients:
One block cream cheese 
Handful of dill and green onion, to taste
2 TB garlic

One loaf crusty bread

Directions:
Soften the cream cheese in the microwave for a few minutes.  Dice the dill and green onion and mix with the cream cheese, along with the garlic.  Spread on the bread (toasted if you like) and enjoy! 

Sara 

Wednesday, June 4, 2014

Pea Salad


Becca here with a recipe that both my husband, Samuel, and I grew up eating!  I remember my mom making this as a side dish that my dad particularly enjoyed.  Samuel's paternal grandmother also makes a very similar salad, and often served it as a main dish for a quick meal when we lived right down the street from them and I was home alone a lot because my husband was traveling for work.  I am going to give a 'recipe' because I actually measured out what I used last time I made it, and I'm sure you can find a similar recipe written out somewhere, but I have never seen it in print; it's definitely a "little bit of this, little bit of that" type recipe that you can be creative with, depending on what is in your fridge, in season, or what your family's tastes prefer.  I like to make a double batch, and serve it as a quick main dish once, and then use the leftovers as a side dish, or for my husband's lunch to take to work, depending on how much is left!  I love that I can make it when I can find a few minutes of time during the day, and have dinner mostly finished when that time rolls around.  Enjoy!

I also wanted to mention that in case you missed it, I used rafflecopter to select a winner of the Redmond Real Salt giveaway and it was announced via our Thrice the Spice Facebook Page, Emily Marsh was the winner.

Pea Salad

16 ounces frozen peas (Mimaw, Samuel's grandmother only uses Le Sueur canned peas, and that saves a step of cooking the peas, so use what you prefer!  You will need two cans of peas.)
1/2 medium onion, finely chopped (I use purple onion normally)
1 cup cheese, in small cubes, or grated (I use sharp normally, and prefer cubed, but grated is quicker)
2-3 hardboiled eggs, finely chopped
2-3 slices of cooked bacon, crumbled (optional, but definitely delicious!)
2/3 cup mayonnaise (I use Vegenaise or olive oil mayo)
Salt & Pepper to taste (I use Real Salt, amount will depend on what kind of peas you used, if you used bacon, etc. :)


If using frozen peas, cook according to package instructions.  Drain cooking water off, and rinse peas in cool water.

In a large bowl, combine all other ingredients (cooked peas, onion, cheese, boiled eggs, bacon, mayonnaise).  Gently stir to combine.  Taste, and add salt and pepper as necessary.

Serve immediately, or, for best taste, let chill in the refrigerator, covered, a few hours or overnight to let flavors mingle.

Monday, June 2, 2014

How to Cook Garden Greens

I'd like to share an easy way to prepare garden greens with you today!  Before I met my husband Brett I had definitely eaten my fair share of garden food.  Then he started mentioning "greens".  These were something we'd have on a regular basis at his mom's house and they become a topic of discussion as we began to plan our garden this year.

When I say "greens" I mean like mustard greens or collard greens.  Kale could also be prepared the same way.  We eat greens as a side.  They're simple to prepare, fabulously nutritious, and taste great.  My girls have even eaten them!

These cook down, way down!  So when I say you'll need 2 cups of greens that is a bare minimum.  It will look like so much in the pan until you start to cook them and they wilt down.  You'll be surprised how your large pan of greens suddenly looks like such a small quantity. So don't be afraid to really fill the pan up, adding more even after they've cooked some.

Greens
Ingredients:
At least 2 cups greens of any kind (mustard, collard, kale)
EVOO (extra-virgin olive oil)
Salt
Vinegar (balsamic or red wine)

Directions:
You can either steam the greens in a bit of water (with the lid off) or cook them in EVOO.  I prefer the EVOO because it gives it a bit more flavor.  You will cook the greens until wilted and then sprinkle salt and a bit of vinegar over the top.  And that's it-you're done!

If you don't have a garden you can always purchase these at the Farmer's Market or buy them in bulk at the grocery store in the produce section!

Happy greens!
Sara


Friday, May 30, 2014

Cream Corn with Dill


Jana here with a recipe that was inspired by my sister-in-law, Bekah!  She is a consultant with Pampered Chef, and I recently hosted a party at my house. We needed fresh dill for one of the recipes, so she and I were talking about other ways to use dill. She mentioned that it was good with corn, so I found an inspiration recipe, and made this Cream Corn with Dill!  We had this with a BBQ meal, but it would go great with a Mexican themed meal too!

Cream Corn with Dill

2 cans of corn (14.5 ounce), or 4 cups frozen corn
4 ounces cream cheese, cubed
1/4 cup milk
1 tablespoon butter
1-2 tablespoons fresh dill, chopped
salt and pepper to taste

1. Melt the butter in a medium saucepan, over medium heat. Add the fresh dill, and simmer for 2-3 minutes.

2. Add the milk, and cubed cream cheese.  Allow to melt, stirring frequently.

3. Add the corn, and salt and pepper.  Stir to combine.

Enjoy!

Friday, May 9, 2014

Creamy Mushroom Risotto


Jana here with a delicious side dish that can be made in under 30 minutes!  (and most of that time is spent with it simmering on the stove top)  I found inspiration for this on All Recipes site. I changed the method of the recipe quite a bit, to make it faster. This was very flavorful, and would go well with a meat and green vegetable!

Creamy Mushroom Risotto  

1 1/2 cups chicken broth
3/4 cup rice, uncooked (I used a mixture of wild rice and brown rice, but I think any type would be fine)
1 tablespoon olive oil
1 pound fresh mushrooms, sliced (or use canned mushrooms)
1 teaspoon minced garlic
1/4 cup grated Parmesan cheese
1 tablespoon butter
1/2 teaspoon onion powder
1/4 teaspoon thyme
salt and pepper to taste

1. In a medium skillet, heat the olive oil over medium heat. Add the sliced mushrooms and minced garlic, and cook for 2-3 minutes. Next, stir in the rice, and cook for 2 minutes. Add the chicken broth, and bring to a boil. Once it is boiling, cover and allow to simmer for approximately 20 minutes. (or until most of the liquid is absorbed)

2. Add the onion powder, thyme, and salt/pepper and stir to combine. Mix in the butter and Parmesan cheese, and simmer for 2-3 minutes.

Enjoy!

Friday, May 2, 2014

Carrot Souffle

Jana here with a recipe that is so yummy, I didn't take the time to get a picture! :)  My Mom recently made this for our family's Easter lunch. We had a potluck of sorts, and this was one of the dishes she brought. Between my sisters and I, we have 9 children. (under the age of 9) So needless to say, when it is time to eat at a family lunch, there is a lot going on!  (Example: "I'm making plates for Caleb and Lainey, can you get Silas' food?"  "Where are the forks?"  "Does anyone know where Malachi went?"  and lots more!)  This dish is very versatile, and would be a great side dish for any meal! (breakfast, lunch, or dinner)  It is very light and fluffy in texture, and the flavor is sweet and delicious!  I hope you'll give this Carrot Souffle a try!  Just for fun, here is a picture of the 9 Thrice the Spice kids!  (Kierstin, the baby in the middle is usually super happy...she just didn't like the idea of a picture at that time!)


Carrot Souffle

1 pound carrots, coarsely chopped
1/2 cup butter
1 teaspoon vanilla extract
3 eggs
3 tablespoons all-purpose flour
1 teaspoon baking powder
1/2 teaspoon salt
1/2 cup sugar

1. Preheat oven to 350 degrees. Lightly grease a 9x13 baking dish.

2. Boil carrots until tender, 15-20 minutes.  Drain, and mash. (or blend in a blender or food processor for a smoother texture)  Stir in butter, vanilla extract, and eggs until mixed well.

3. Sift together flour, baking powder, salt, and sugar. Stir into the carrot mixture until combined and smooth.

4. Pour into prepared baking dish, and bake for 45 minutes.

Enjoy!

Monday, March 24, 2014

Best hummus ever.


How's that for an original title and recipe name?! The truth is, my sis-in-law to be sent me a text one night asking if I liked hummus, to which I eagerly replied "yes!"  She brought some by the house for me and it is seriously the best hummus I've ever had.  And I've tried a lot of kinds!  It is flavorful and much thicker than the kind you buy at Wal-Mart, which I prefer.  It is peppery and a bit spicy. Absolutely delicious! I asked her to share the recipe so today I am the humble message bearer of such good news.  Best hummus ever! 

Ingredients:
1 can drained chickpeas (garbanzo beans) 1/2 lemon (juiced) 1 tbsp. tahini (sesame butter) - I add some sesame oil as well from the jar 4 to 5 garlic cloves 1-2 tbsp. olive oil salt & lots of fresh cracked pepper

Directions:

Blend all ingredients together in a blender or food processor until smooth and well incorporated. Garnish hummus with olive oil, herbs, pine nuts or whatever you please. Enjoy!

Sara


Monday, March 17, 2014

Roasted mushroom, red onion, and chickpeas


I love it when a dish is "born" or created out of necessity and then it actually tastes good (like really good) too!  That is exactly how this little side dish came to be.  One weekend recently we had gorgeous weather and all decided to spend the afternoon together in the garden.  It was glorious and fun, but meant I got a late start on dinner.  I quickly looked to see what vegetables we had that I could make a side with.  I ended up combining mushrooms, red onion, and chickpeas together with some spices and roasted them.  The result was a delicious, very quick and easy, side dish!  My girls really liked this one too!  An extra bonus.

Roasted mushroom, red onion, and chickpeas

Ingredients: 
8 oz. pack sliced mushroom
1 can chickpeas
1 red onion, diced
1-2 TB EVOO (extra-virgin olive oil)
spices of your choice (I prefer garlic powder, and an italian seasoning mix)

Directions:
1.) Combine the mushrooms, rinsed chickpeas, red onion, and spices in a bowl.  Add 1 or 2 TB of EVOO and mix well.  
2.)  Pour mixture into a glass cooking pan and roast until slightly crispy, around 20-25 minutes.

Wednesday, March 12, 2014

Falafel aka: chick pea patties


Becca here with a recipe that is a great quick and easy weeknight recipe that my kids love.  I know that chick pea patties sound a bit strange, but I don't think you would ever, ever guess that a bean is the main ingredient.  They have a great light, almost fluffy texture, with a savory flavor.  We love them with guacamole or diced avocado on the side, or just plain.  My child that can be slightly particular lately likes them with ketchup.  But all four of my kids really like these "bean patties" as they call them, and I feel great about the protein and other nutrients they're getting in a super quick and easy meal.  I grind chick peas (also known as garbanzo beans, of hummus fame!) in my mill, but you can buy garbanzo bean flour also.  Bob's Red Mill sells it nationwide; this (admittedly nontraditional) falafel recipe adaption that I've made is based on one on their website. 

2 cups garbanzo bean flour
1 tsp. salt
1/2 tsp. baking soda 
1 tsp. granulated garlic
1 tsp. onion powder
4 tsp. lemon juice
1 cup hot water


Combine all the dry ingredients in a bowl and mix well.

Add the lemon juice and hot water to the dry ingredients and stir until combined. Let the mixture rest for 10 minutes.


Meanwhile, on a large frying pan or griddle, heat a small amount of oil on medium-high heat until hot (I use about a Tablespoon of butter or coconut oil). Add the falafel batter by the tablespoon and flatten slightly. Cook on both sides until golden brown.  Enjoy warm or at room temperature.

Friday, March 7, 2014

Simple Savory Quinoa


Jana here with a new quinoa recipe!  I love how versatile quinoa is. You can make so many different flavors work with it, and it can even be used in baking. Not only is it versatile, but it's so healthy!  It's a win win!  I found this side dish on All Recipes, and made some modifications.  Everyone in the family loved it, and it will definitely be added to our list of favorite quinoa dishes!

Simple Savory Quinoa

2 tablespoons olive oil
1 stalk of celery, finely chopped
1-2 carrot sticks, diced
1 small onion, minced
1 garlic clove, minced
1 cup stock (I used homemade chicken stock we had on hand)
1/2 cup uncooked quinoa
1/4 teaspoon dried basil
1 teaspoon lemon juice
1/2 teaspoon Italian seasoning
salt to taste

1. Heat the olive oil in a saucepan over medium heat. Stir in the celery, carrots, onion, and garlic. Cook, stirring often, until the onion and celery are turning clear. (about 5 minutes)

2. Stir in the stock, quinoa, basil, and Italian seasoning. Bring to a boil, then reduce heat to low, cover, and simmer for 25-30 minutes. (until the quinoa has absorbed the liquid)

3. Once done, stir in the lemon juice, and salt to taste.

Enjoy!


Wednesday, February 19, 2014

Broccoli Pesto Pasta


Becca here with a recipe I actually made up at the last minute while trying to clean the fridge out.  Which, in my previous experience, can either be a really good thing, or a really bad thing.  Fortunately this time it was a good thing; all six members of my family actually really enjoyed this quick and easy pasta dish!  Best of all, it cooks quickly in one pan, so clean-up is easy.  I used one large bunch of broccoli, but you could easily sneak some more in if you have it.  We ate the pasta with fish and fruit for dinner.  Enjoy!

16 ounces your favorite pasta
1 broccoli bunch or crown (about 4 cups finely chopped)
3/4 cup your favorite pesto, homemade or store bought
1/4 - 1/2 cup reserved pasta cooking water

Cook pasta according to directions on box, adding broccoli during last 3 minutes of cooking time.

Drain, reserving 1/2 cup of the pasta cooking water.

Stir pesto into pasta, adding reserved cooking water a bit at a time, as needed.

Wednesday, February 5, 2014

Golden Potatoes Casserole


Becca here with a family recipe that we girls grew up eating, cooked by our Mom, and our Grandma also.  In fact, it's still a family favorite, and makes its' appearance at holiday gatherings and dinner tables.  The steamed, shredded carrots give a nice color to the potatoes, and make them look even cheesier than they already are.  I don't know a kid that doesn't like them!  Thanks to Momma for sharing the recipe with us today.  Enjoy! 
 
Golden Potatoes Casserole
6-8 Servings
 
4 medium potatoes
1 egg, beaten
1/2 cup sour cream
1 tsp. salt
1/2 tsp. pepper
1 cup cheddar cheese, shredded
1 1/2 cups carrots, shredded
2 Tablespoons margarine
 
Wash, peel and boil potatoes until tender. Beat until fluffy.
 
Stir in egg, sour cream, salt, pepper and 1/2 cheese.
 
Steam carrots in 1/4 c water.( I use the microwave) Drain.
 
Fold carrots into potato mixture: place in a greased casserole dish and dot with margarine.
 
Top with remaining cheese. Bake at 350 degrees for 20 min.

Tuesday, February 4, 2014

Roasted Zucchini and Chickpeas


Hi everyone, a day late!  I'm hoping that you're staying warm and eating some good food while you're at it.  Todays recipe is a quick and easy one, but a very tasty one!  My girls both really like chickpeas.  I think they look more like a snack food to them.  Add in some zucchini, salt, and EVOO, and you have a tasty treat! 

Roasted Zucchini and Chickpeas 
Ingredients:
2 zucchini, thinly sliced
1 15oz. can chickpeas, drained and rinsed 
2 TB EVOO (extra-virgin olive oil)
Lemon juice
Salt/pepper

Directions:
Combine the sliced zucchini, chickpeas, and EVOO in a bowl and mix well.  Season with salt and pepper (I usually sprinkle a generous amount on), and with the lemon juice.   I don't generally measure the lemon juice beforehand but use about 2 tablespoons.  Mix together well. 

Roast for about 20 minutes in the oven at 425 degrees.  After removing from the oven you may drizzle an additional TB of EVOO and a dash of lemon juice on top, or eat it without for a more crunchy taste. 

Enjoy!